There are a variety of features Teachers can leverage during Written and Verbal RoundTables. In this article, we will discuss valuable roles and activities that Teachers take on in Parlay. There are many links to other Parlay Help articles embedded within this article that provide more detail on each role or feature.
We will discuss:
-
The Basic 4 features in a Written and Verbal RoundTable
-
10 Ways To Leverage Parlay as a Teacher
The Basic 4
-
Starting a Written or Verbal RoundTable
In the Written RoundTable, the teacher’s role is to set up the Written RoundTable, invite students and assess students. Teachers can either create their own Written RoundTable or use one found in the Parlay Universe and make any edits they see fit.
In the Verbal RoundTable, the basic role of the teacher is to set up the Verbal RoundTable and start the discussion.
2. Setting Assessment Criteria
In both the Written and Verbal RoundTable, teachers can set up assessment criteria so that students know what the teacher is looking for in their submissions. Teachers can use criteria already developed by Parlay or create their own.
3. Assessing Students
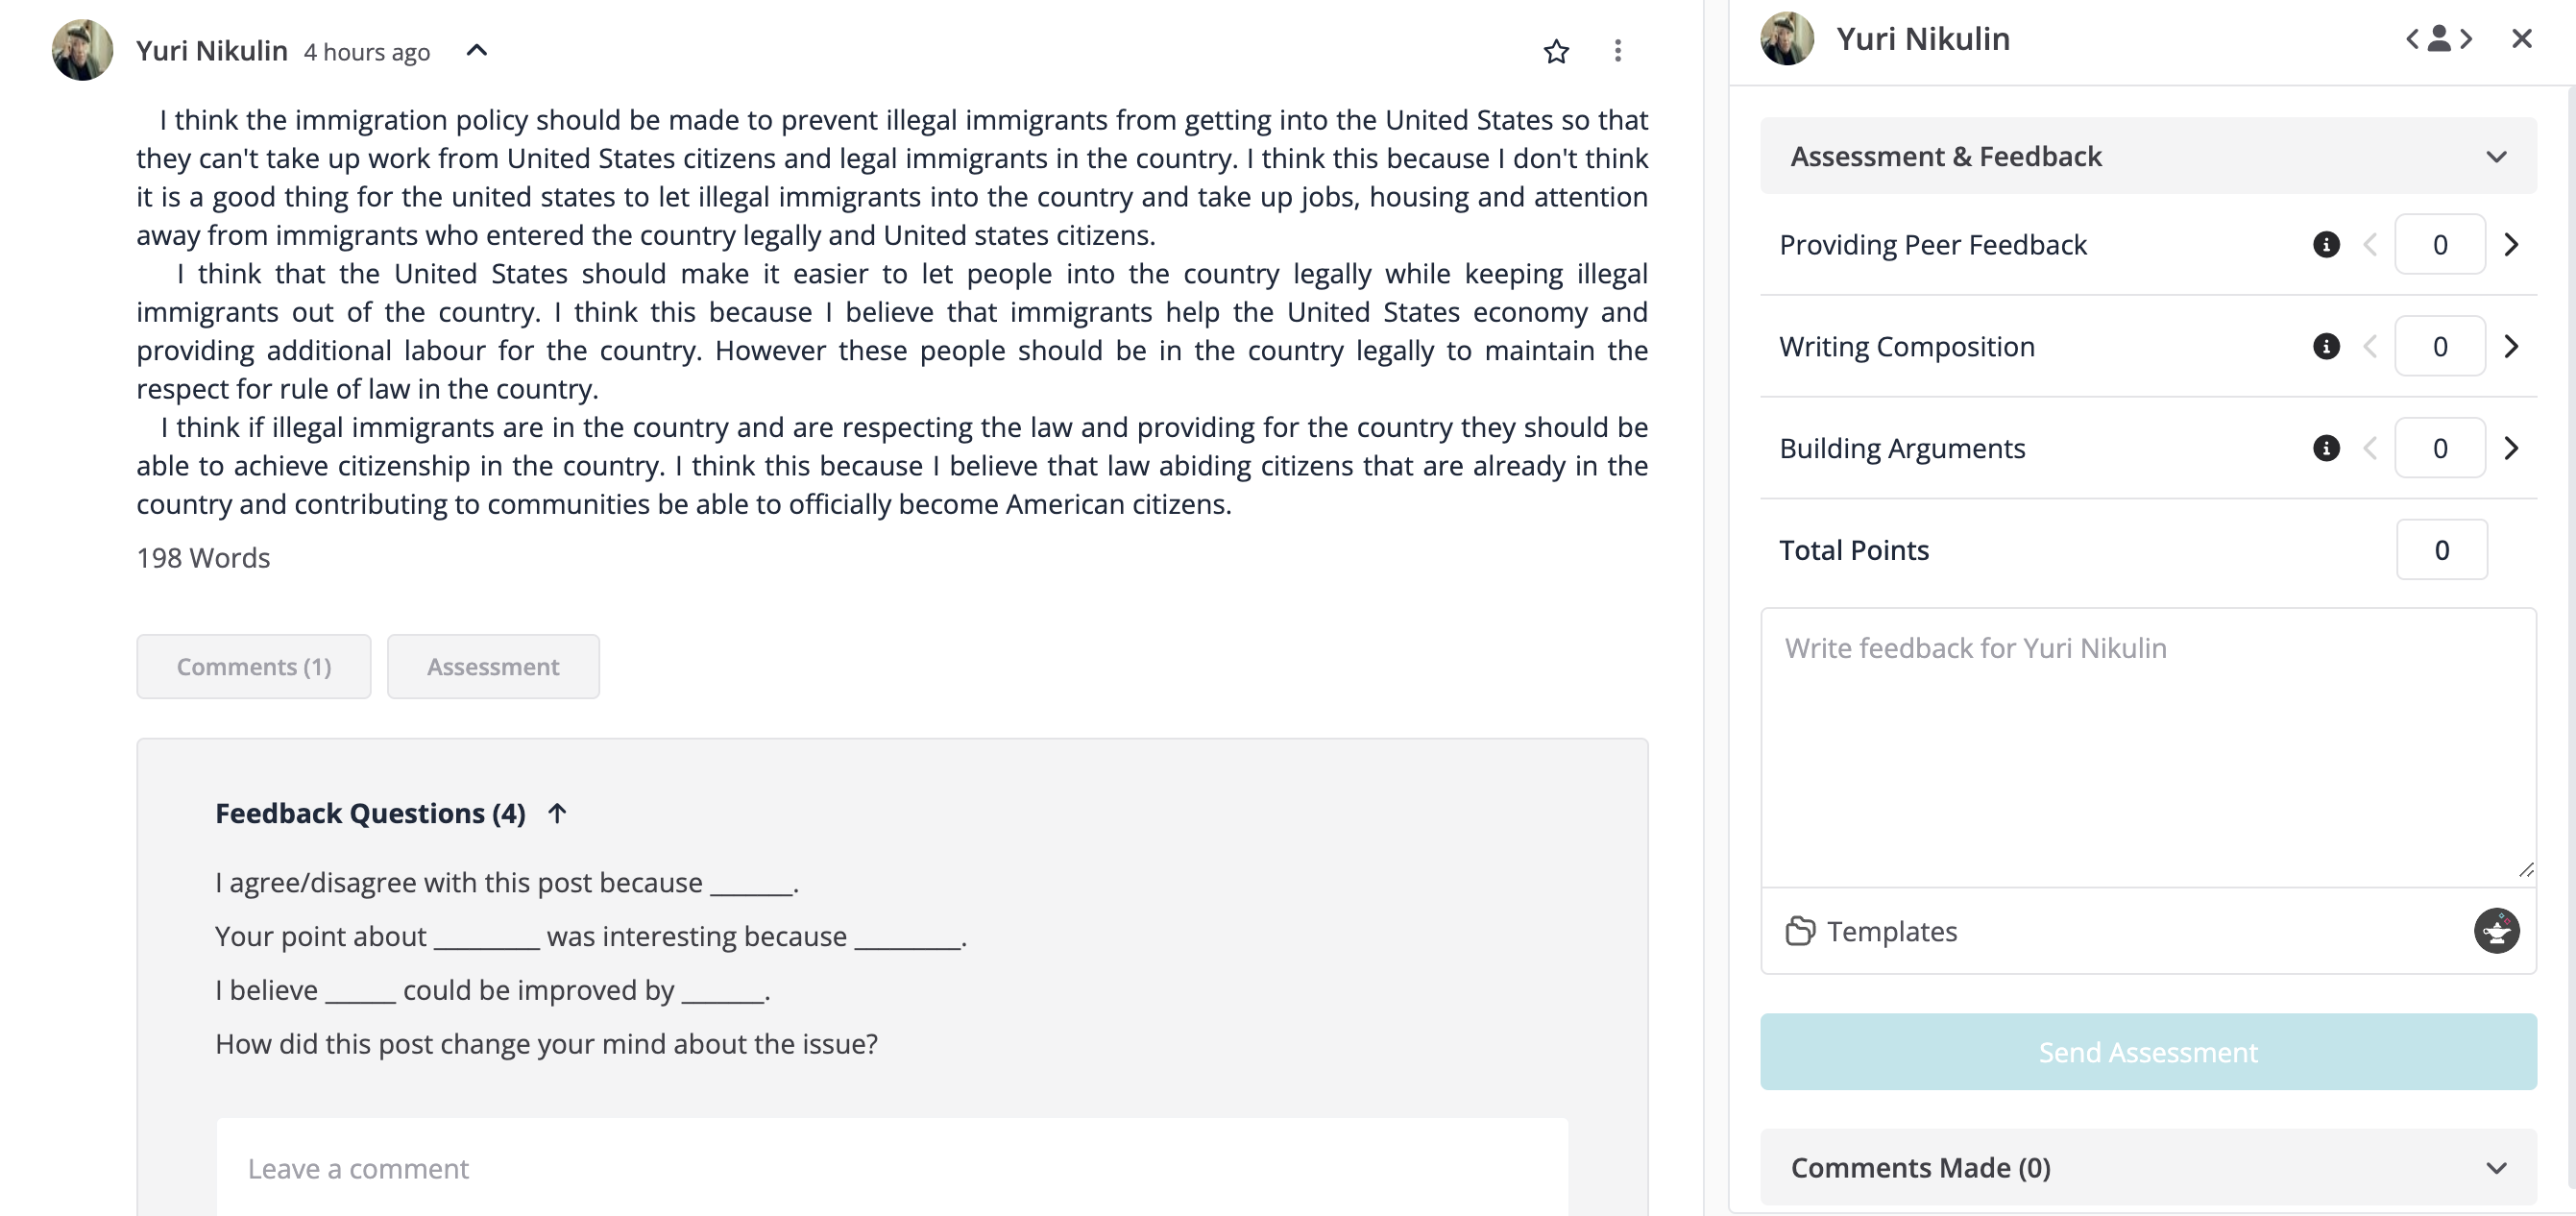
In the Written RoundTable, the teacher can assess student responses.
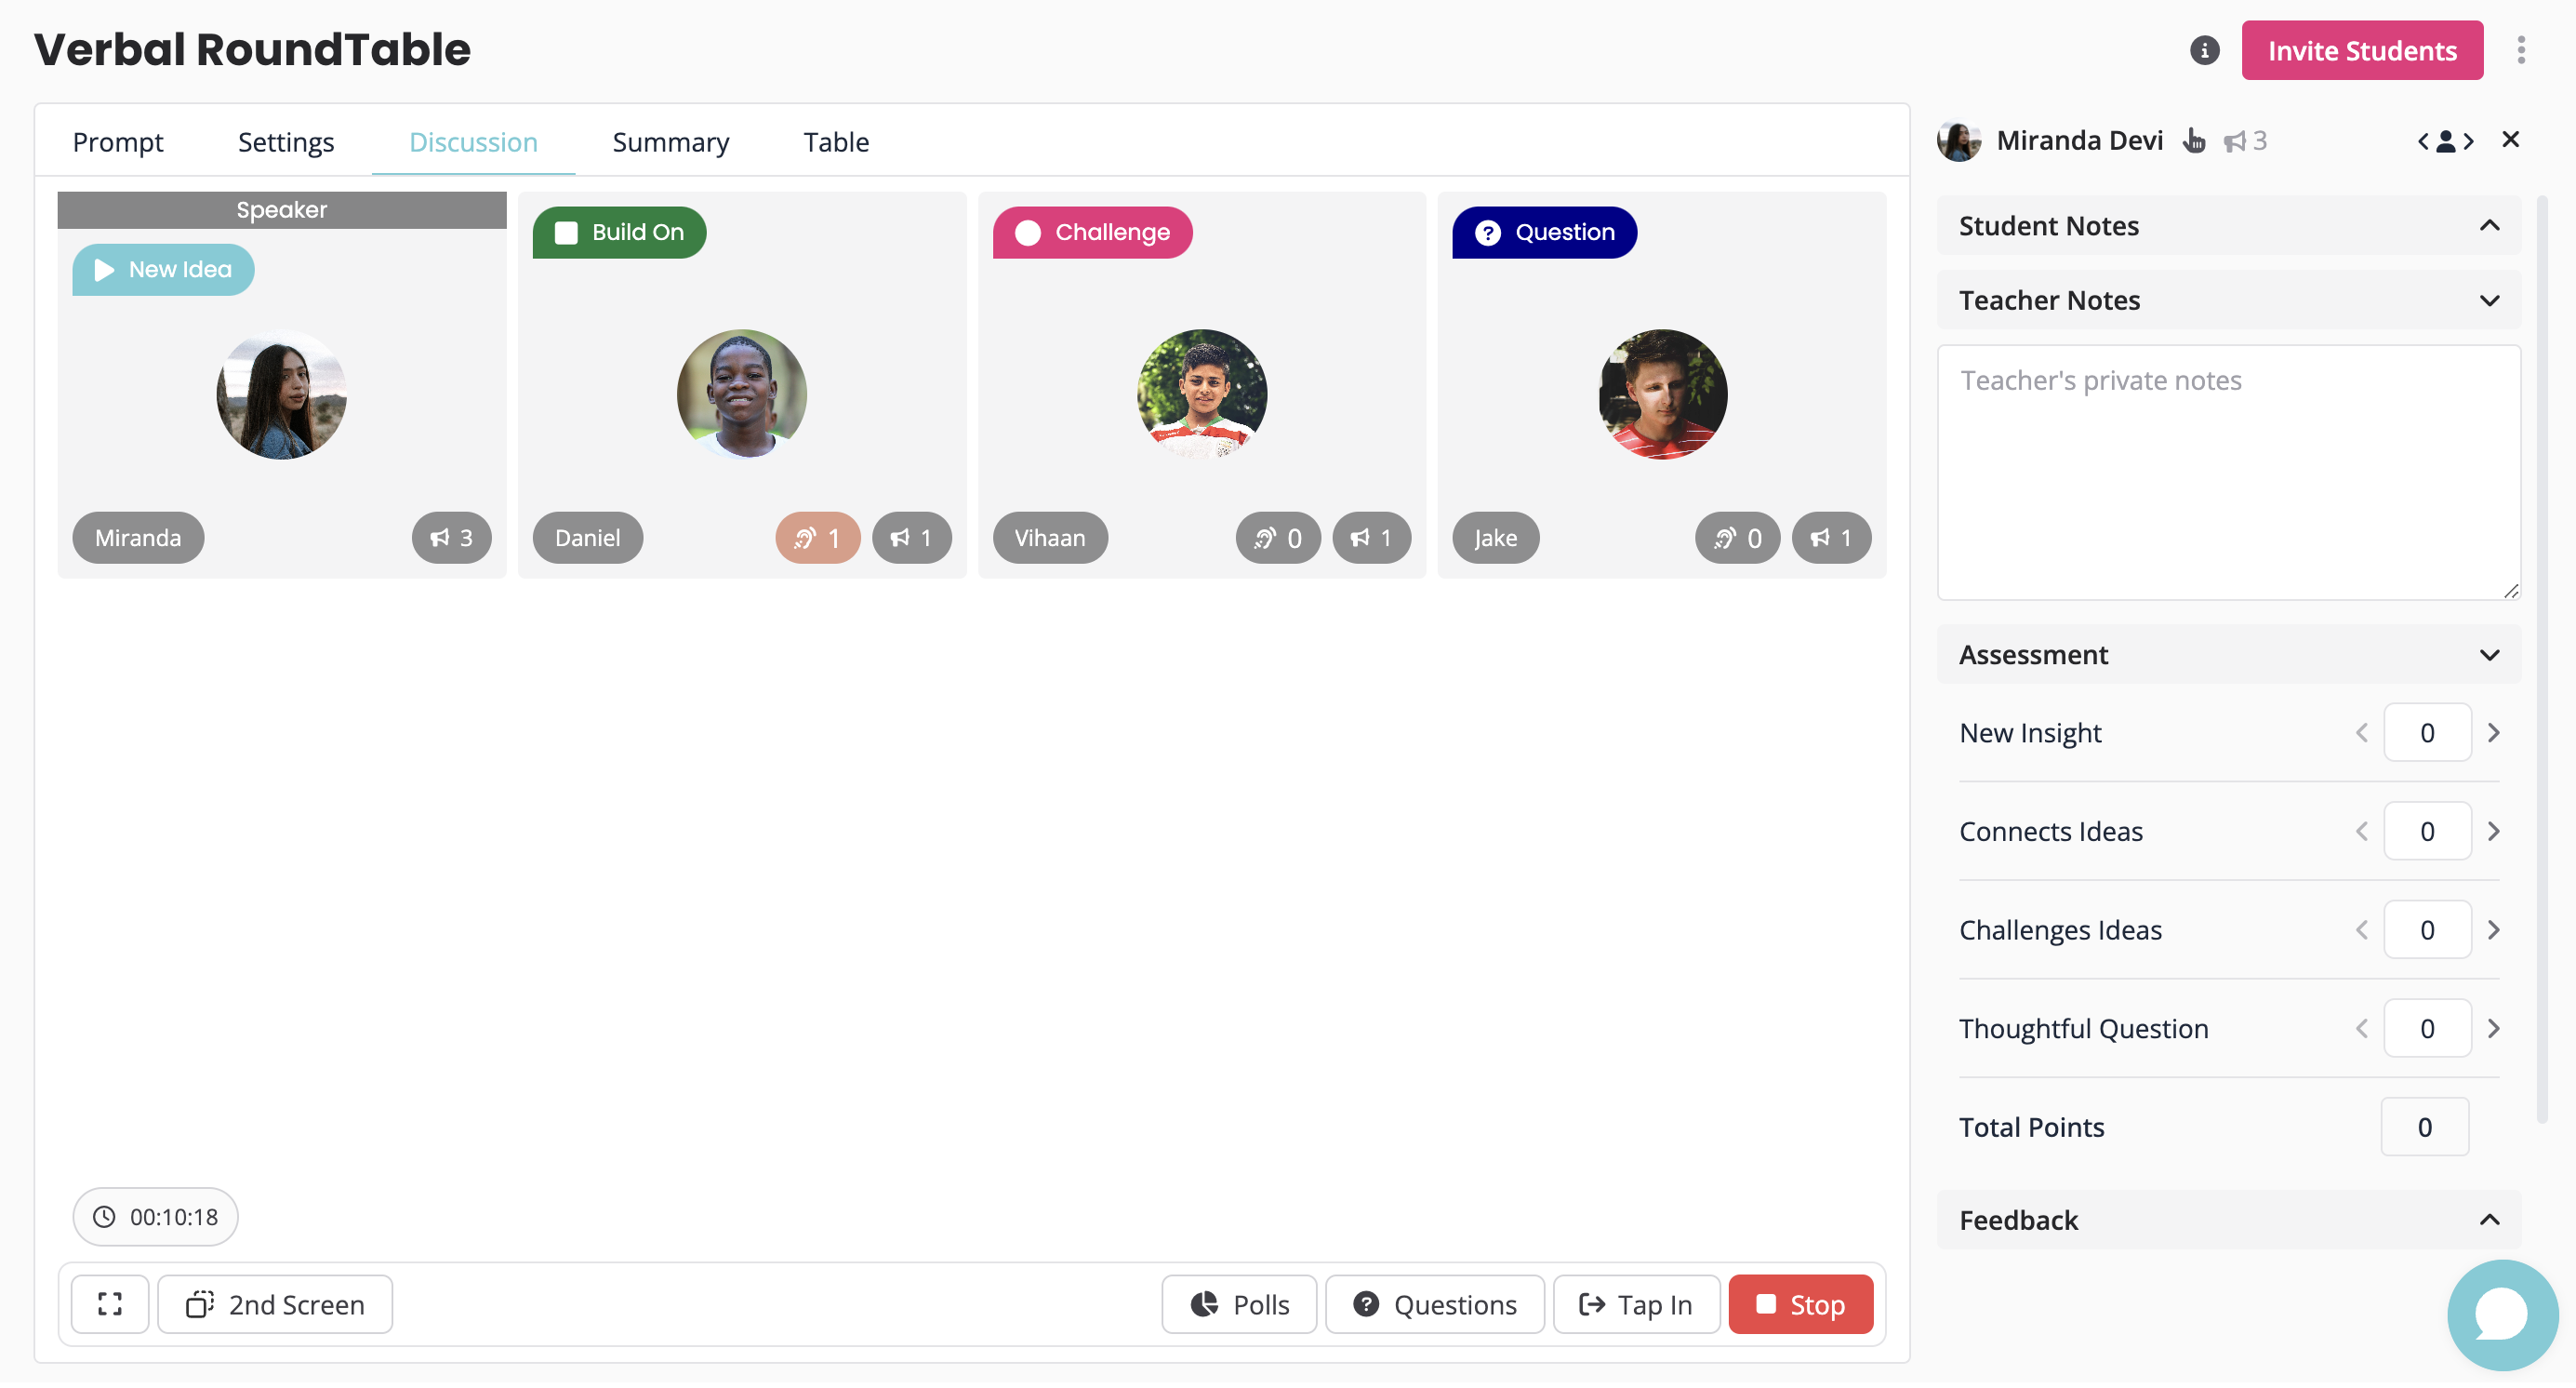
In the Verbal RoundTable, the Teacher can assess students during the discussion.
4. Ending the Discussion
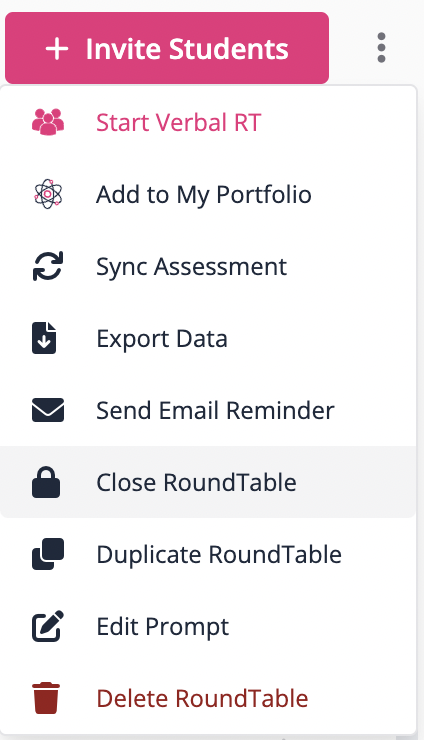
In a Written RoundTable, Teachers can end the discussion by clicking the three dots in the top right corner and choose Close Discussion.
In a Verbal RoundTable, Teachers can end the discussion by clicking the Stop button.

Those are the 4 Basic Roles of a Teacher during the Written and Verbal RoundTables.
Keep reading below to learn how to leverage additional features Parlay offers in your discussions!
10 Teacher Actions in a Parlay RoundTable
Let's start with the Written RoundTable!
-
Peer Feedback Questions
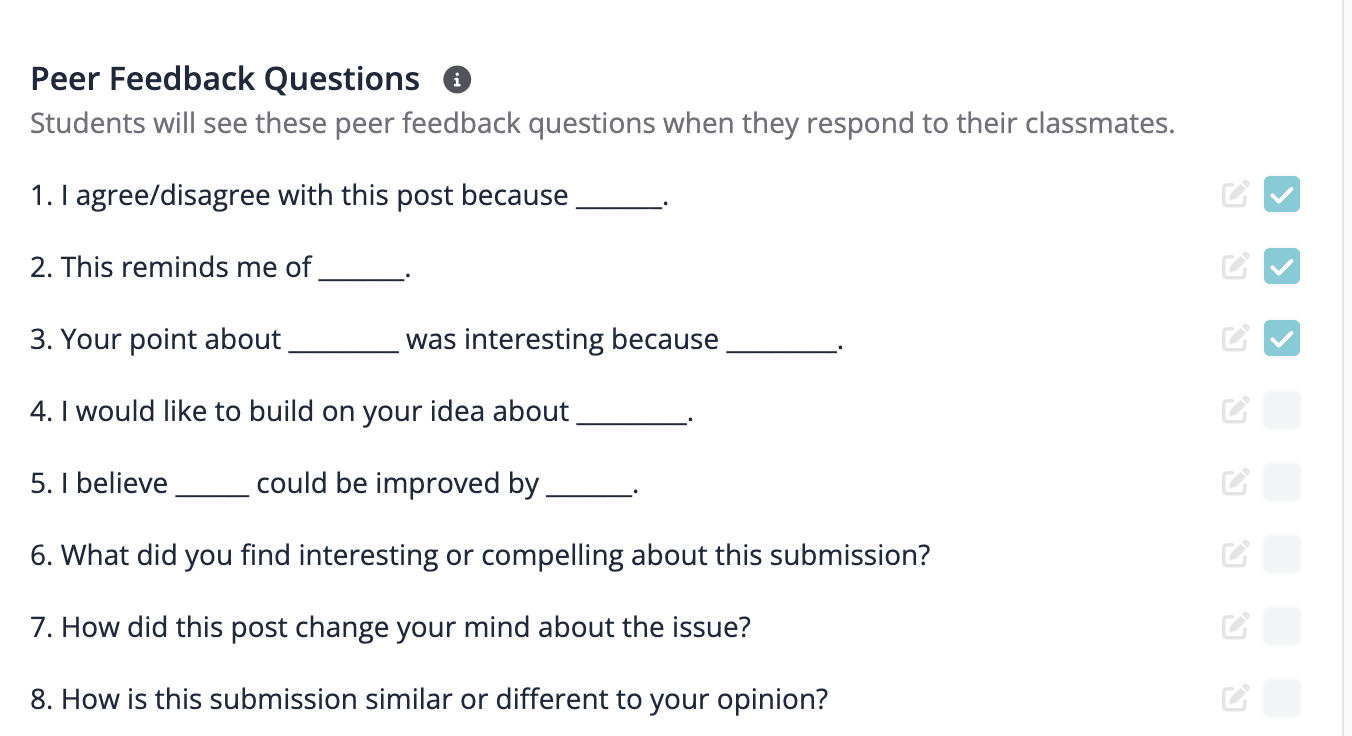
In a Written RoundTable, teachers can edit and create the questions that students will use to prompt their discussion responses to their peers.
2. Highlight Model Submissions ⭐
In a Written RoundTable, Teachers can highlight Model Submissions that are meeting and/or exceeding the expectations for a discussion. This can help students understand the discussion expectations as they are able to use the Model Submission as a guide. Click here to learn more about using Model Submissions in your discussion .
In a similar way, you can participate in the discussion as a Teacher! Submitting a teacher response provides guidance for your students, or you can extend the discussion with further questions. Check out this article that shows you how to submit a Teacher Response.
3. Hiding Submissions and Comments
Although our goal is to facilitate rich, meaningful, and respectful discussions, sometimes moderation is necessary. As a teacher, you can hide submissions and comments so that only you and the student that made the comment can view it.
Students have the ability to edit their original submission.

4. Use the Genie Grader to draft written feedback on student responses
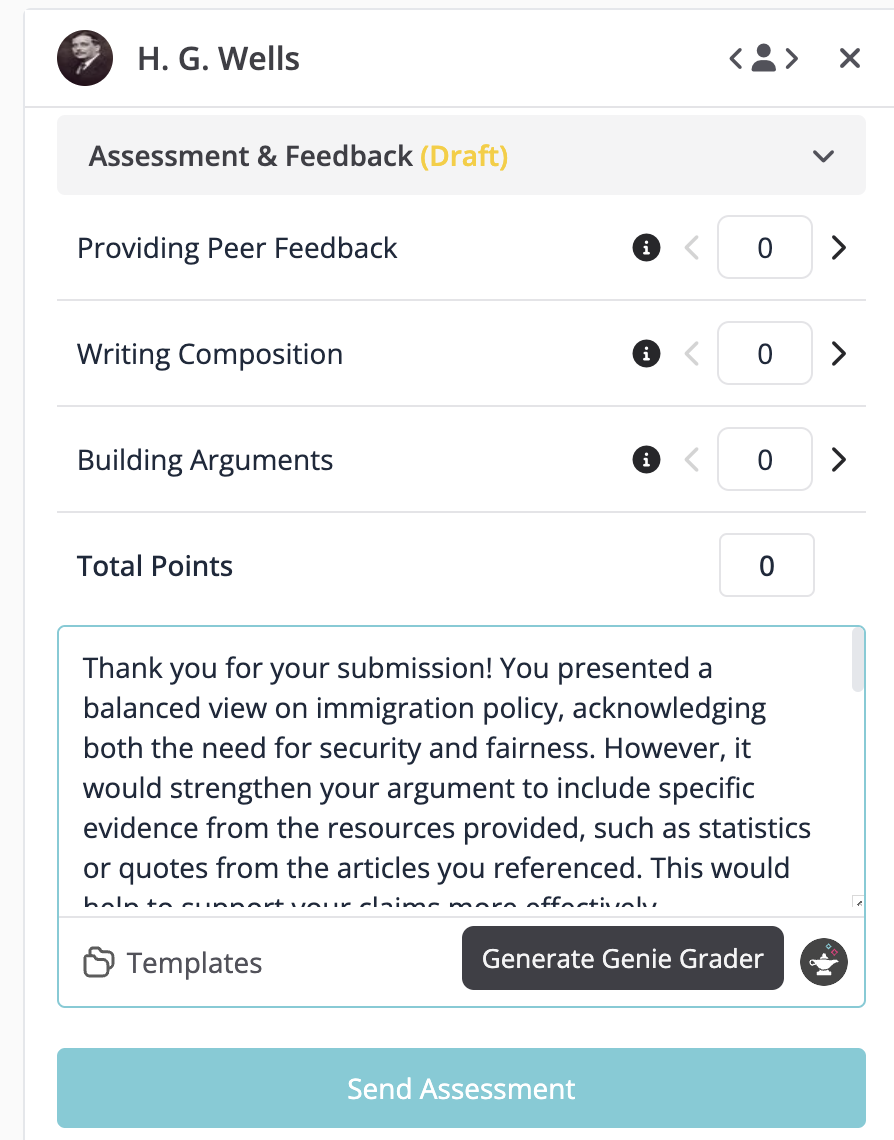
This will draft feedback on student writing according to the prompt and the criteria you set.
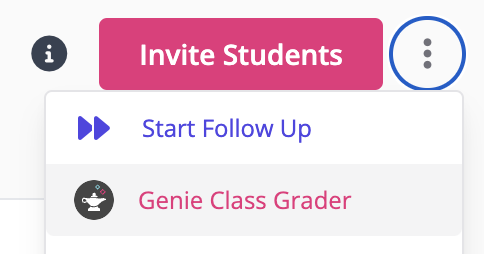
Once it's done, you will see it in the assessment box when you click a student's name. You can make any changes to the feedback before you send it to the student.
Now let's look at the Verbal RoundTable!
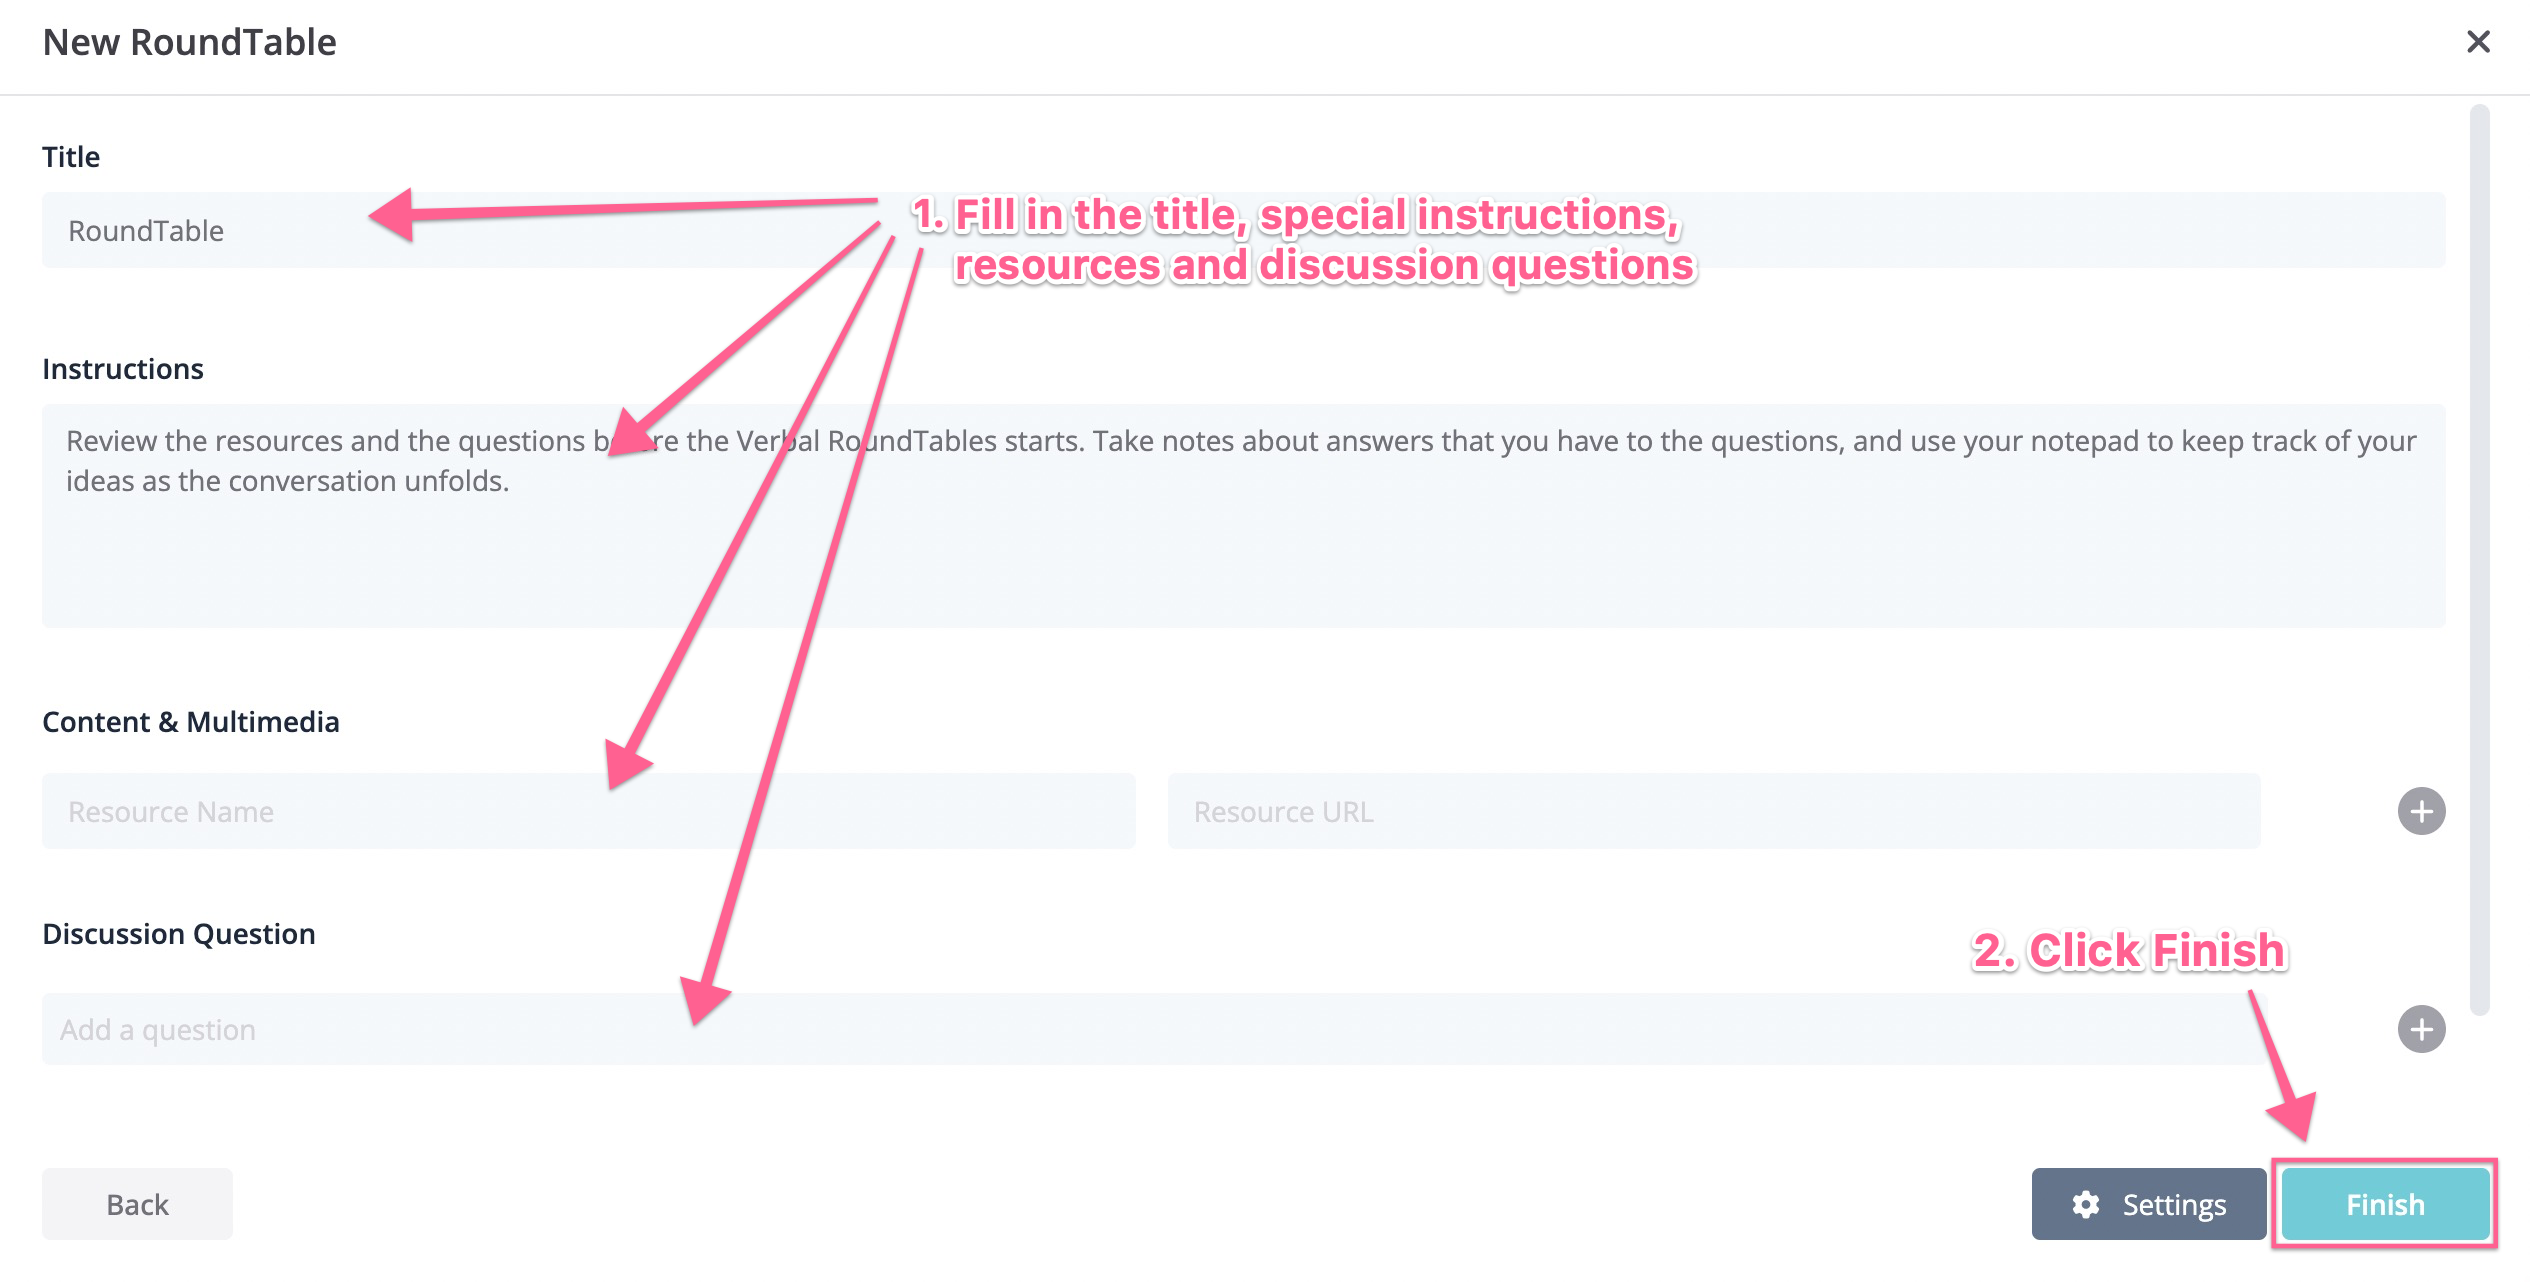
5. Adding Discussion Prompts
In a Verbal RoundTable, Teachers should add prompts such as links to resources and guiding questions. If resources are lengthy, it is good practice to give students access to the Verbal RoundTable ahead of time so that they can review the resources thoroughly. Don’t worry - the Verbal RoundTable cannot formally start without you clicking start.
6. Sending out Polls
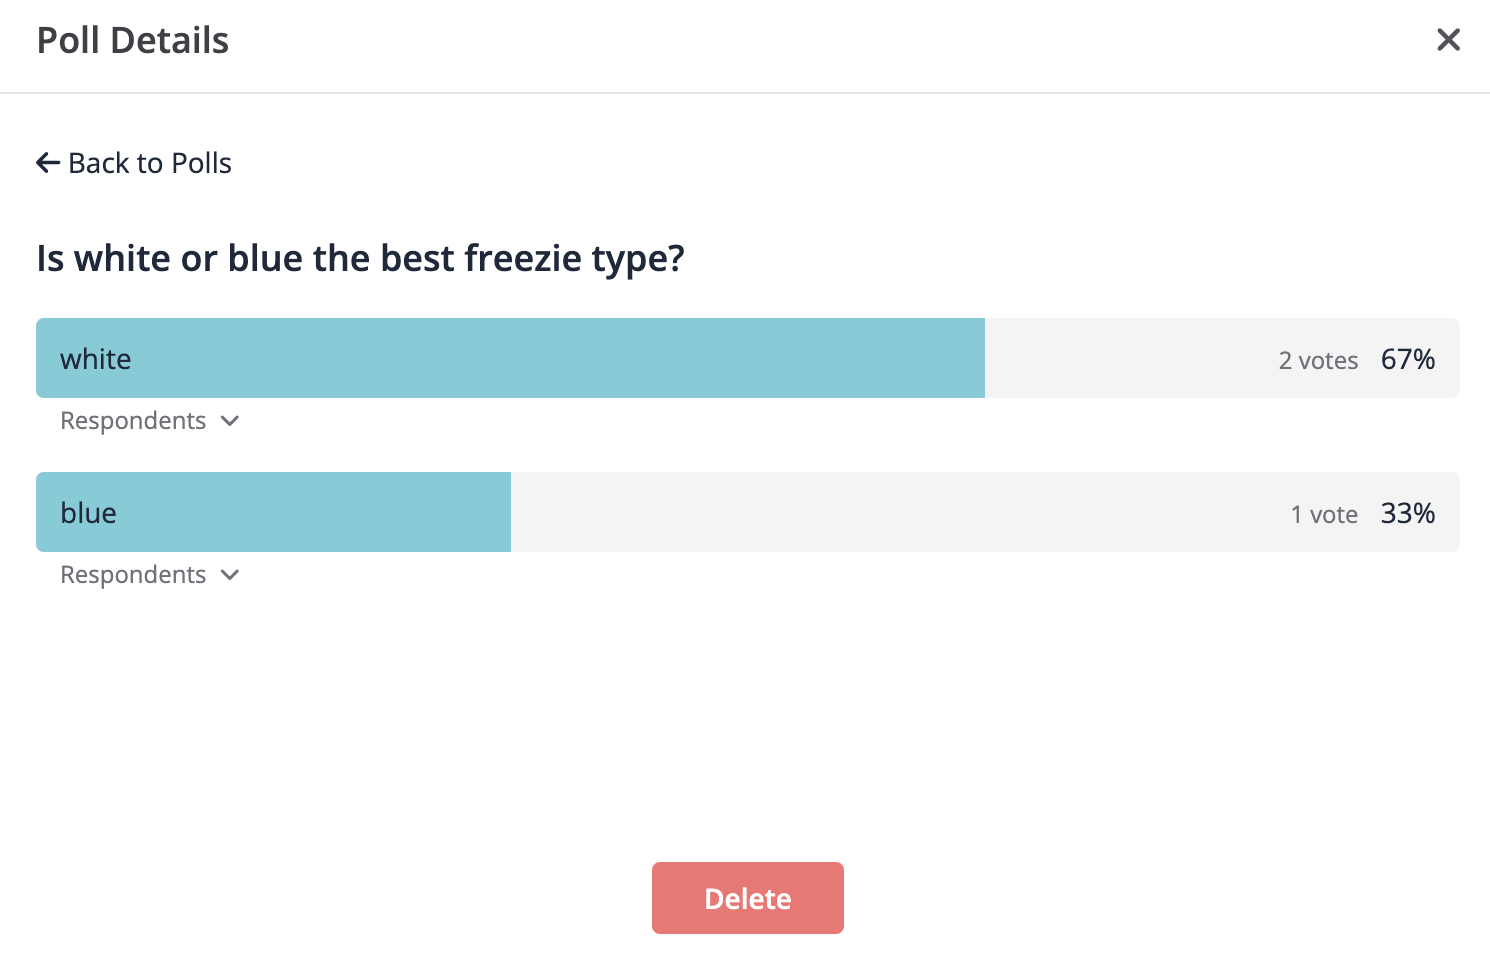
Using polls can help keep your discussion going and spark new ideas! You can pre-set your polls that you would like to send out during the discussion. After you create a new poll you can save it as a draft. Students submit anonymously to polls during the discussion.

Note: Teachers can see poll results for each student in the Verbal RoundTable but students cannot.
7. Using the Queue System
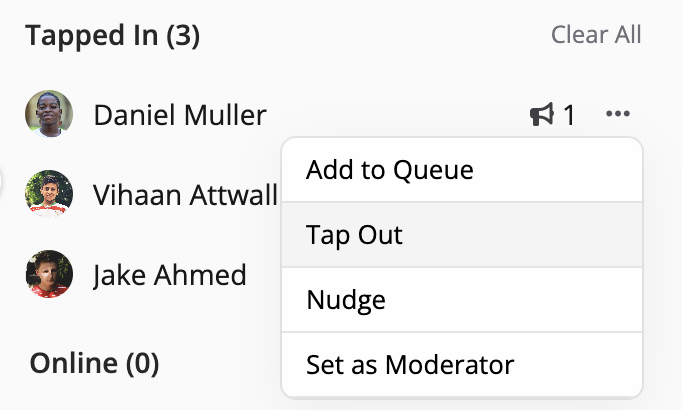
When students have tapped in to speak, you can add them to the queue by hovering over their name and clicking Add to Queue.

Sometimes students forget to tap in and out, but as a Teacher you can add and remove them from the queue.
8. Nudge Students
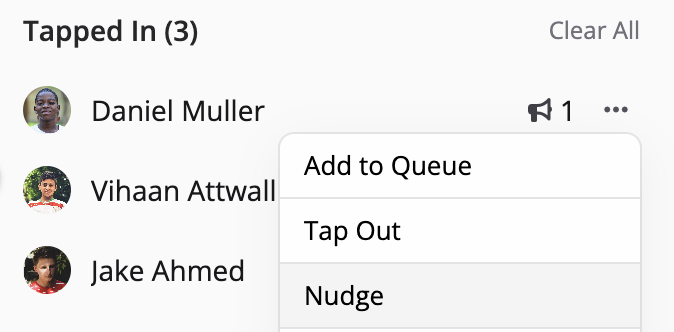
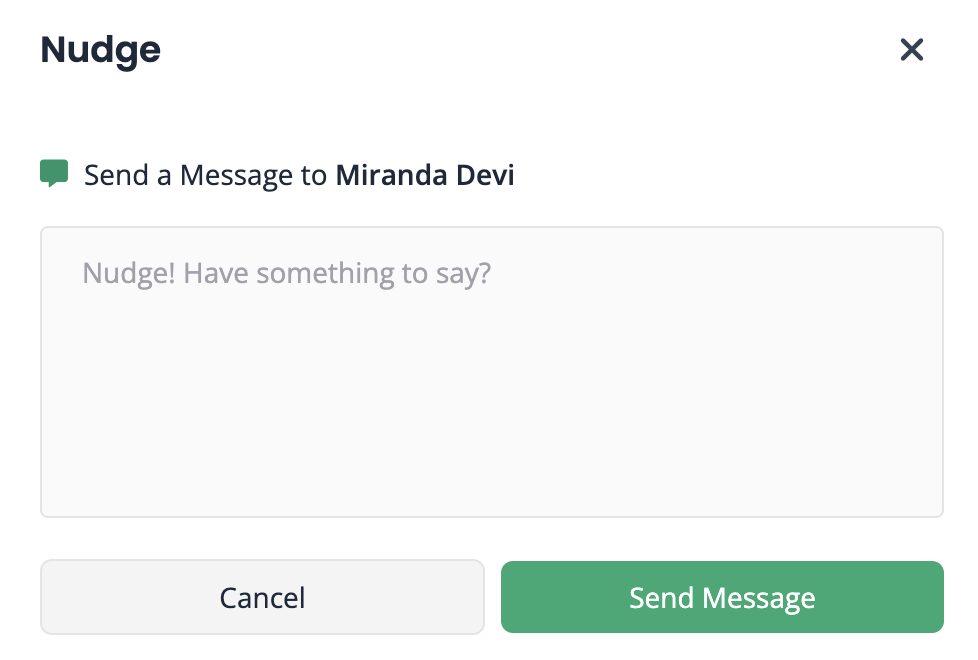
A fun feature in the Verbal RoundTable is the Nudge! As a teacher, if you notice a student has not yet tapped in you can send them a “Nudge” with a private message to motivate them to join the discussion.
9. Student Moderators
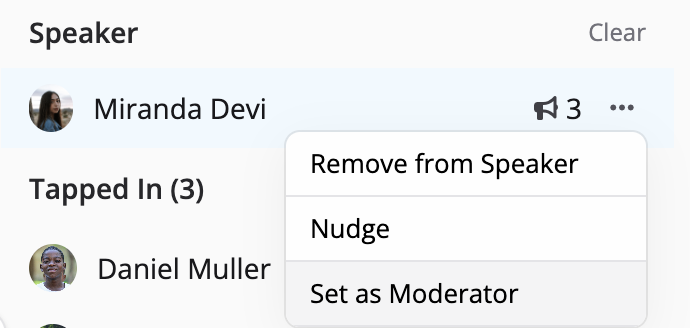
Teachers can assign a student moderator at any time which will enable that student to add/remove their peers from the queue. This can help to strengthen student autonomy as the discussion continues without a Teacher leading.
To select a student moderator:
1. Click the three dots beside the student's name in your class list.
2. Select Moderator to assign this role to them. You can switch the Moderator role at any time during the discussion.
10. Use Your Assessment Window!
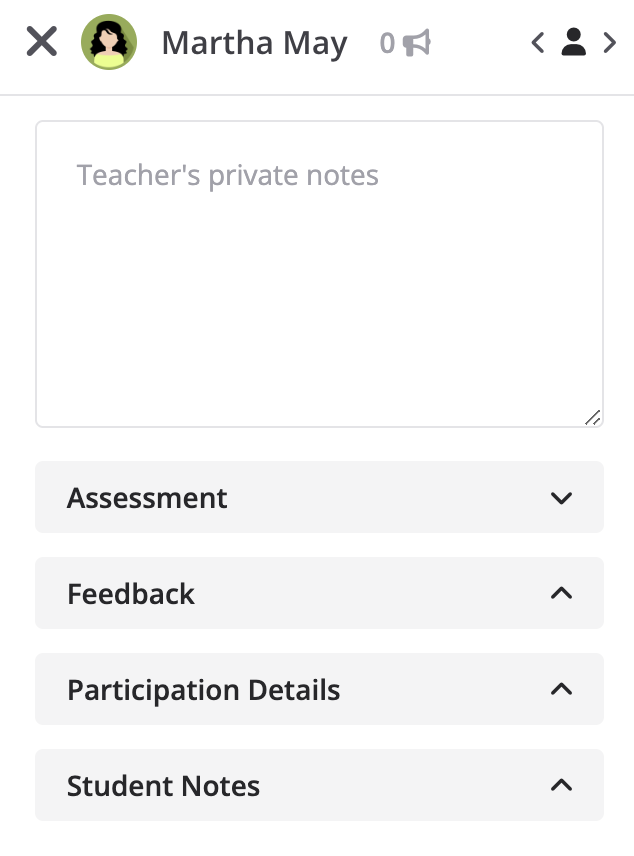
When you click on a student’s name during a Verbal RoundTable, an assessment window appears that has 4 different tabs:
Teacher Notes
During the discussion, you can type notes about the student that only you can see. These notes can help you create your Feedback for the student after the Verbal RoundTable. Write some notes as a student participates, and then easily move on to another student!
Assessment and Feedback
In this tab, you will provide Feedback for the student. Parlay automatically shares information about the frequency of Nudges and messages attached. In this tab, you can also provide written Feedback for the student and assess them in each of the criteria you selected. Students will not see their Feedback until the Verbal RoundTable has ended.
Participation Details
This tab allows you to see details about the student’s participation in the discussion including the frequency in which they tapped in with different types of ideas. If a student has very little tap-ins, you may want to use the Nudge feature with a motivating message discussed earlier. If a student has a large number of tap-ins, it may be helpful to send a Nudge with a private message.
Student Notes
In this tab, you can see the notes the student wrote during the discussion. This can further inform your assessment, especially if the discussion was quick and they did not get a chance to share all of their ideas.
There you have it!