Here's how you can create small group discussions using Verbal RoundTables:
1. Create a Verbal RoundTable
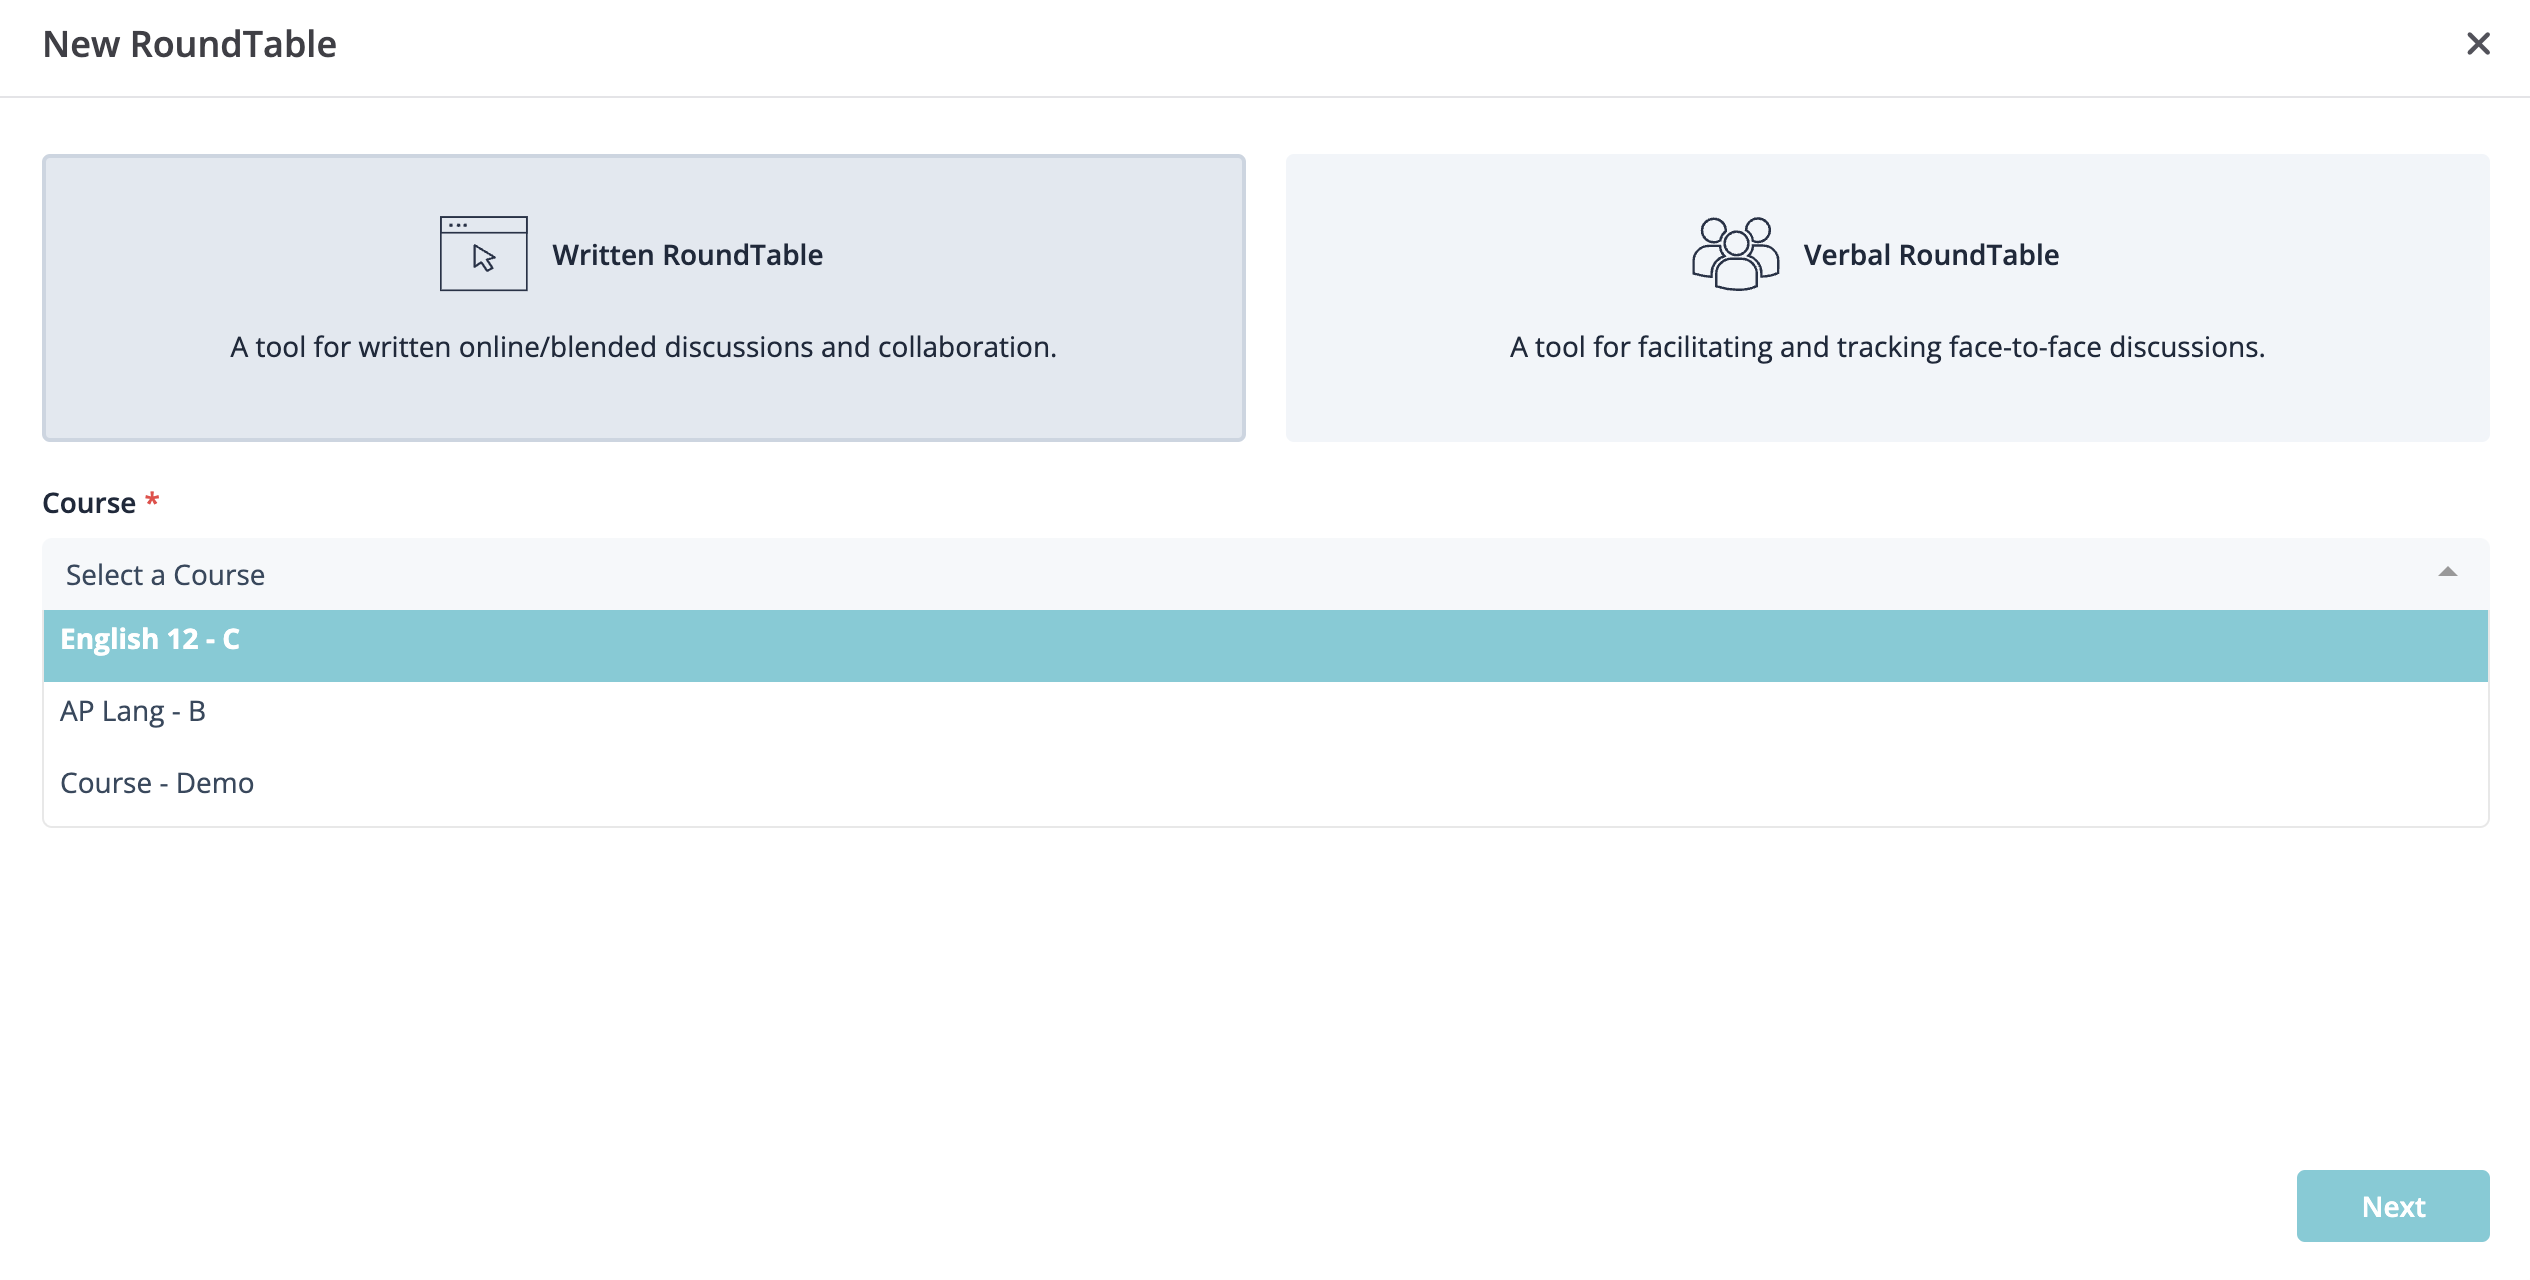
Click Create New RoundTable, select your course, then select “Verbal.”

Next, select "Verbal RoundTable"
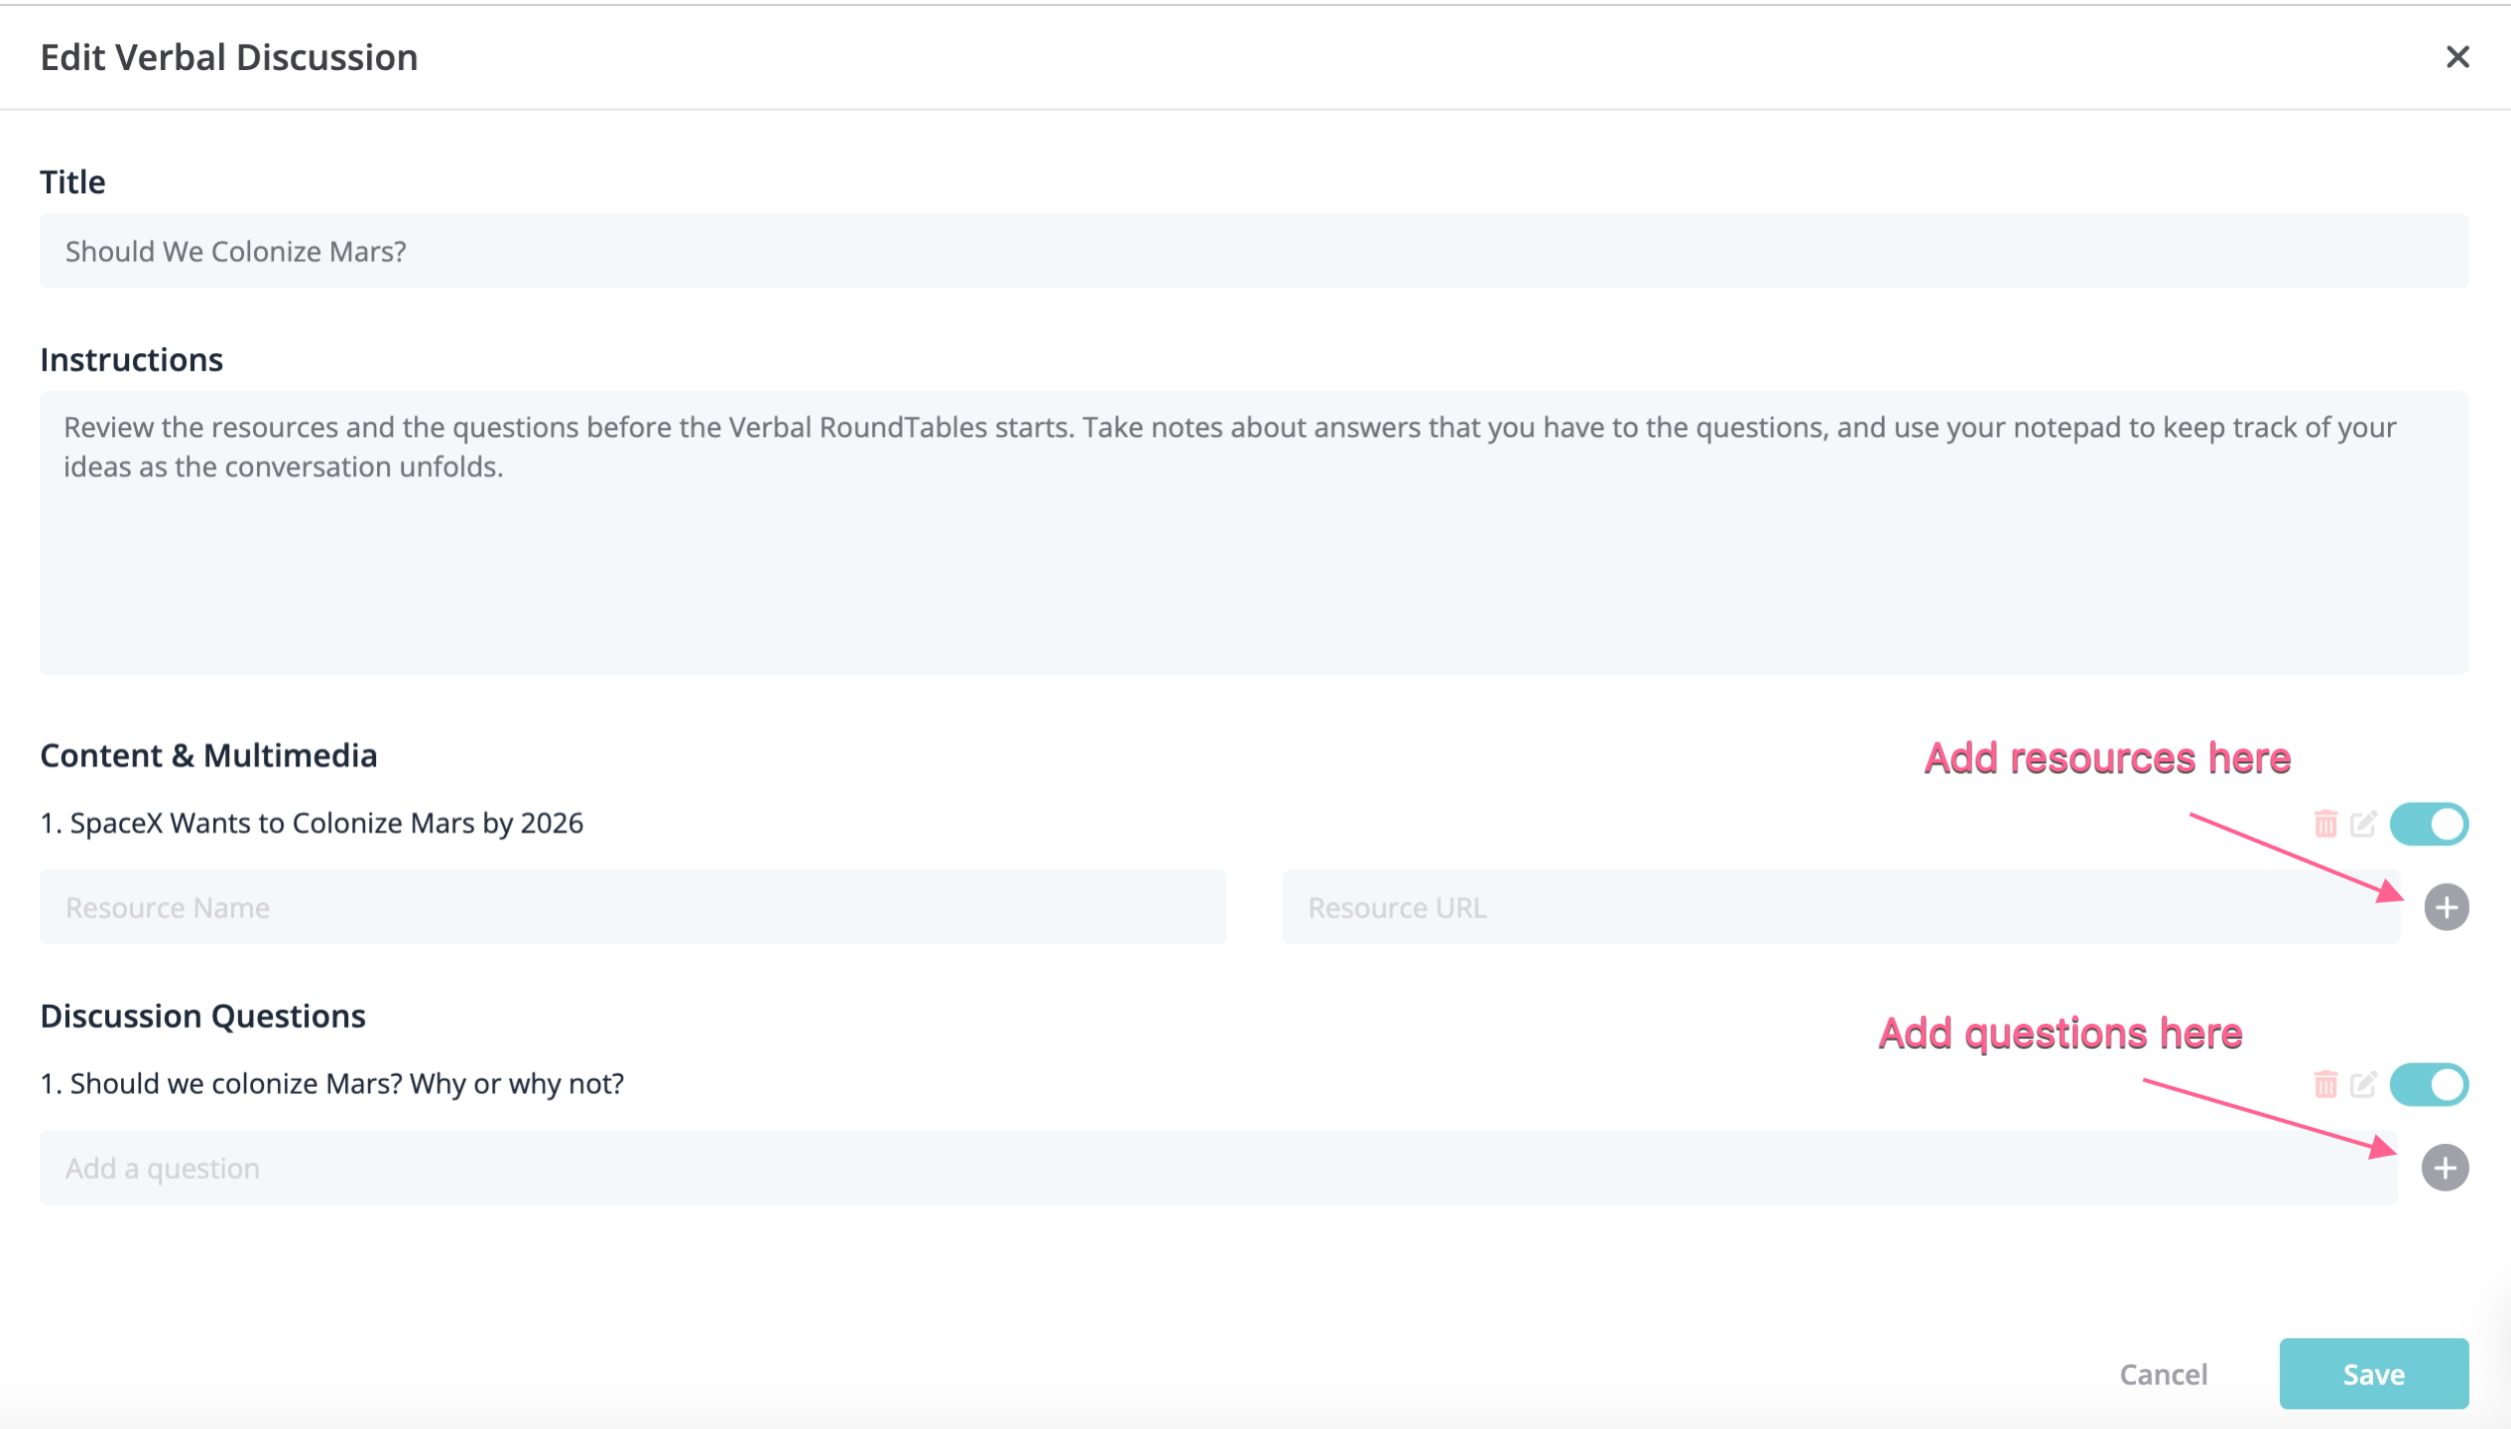
2. Fill in the Prompt
Type in the key questions and add any resources you would like your students to explore in this discussion.
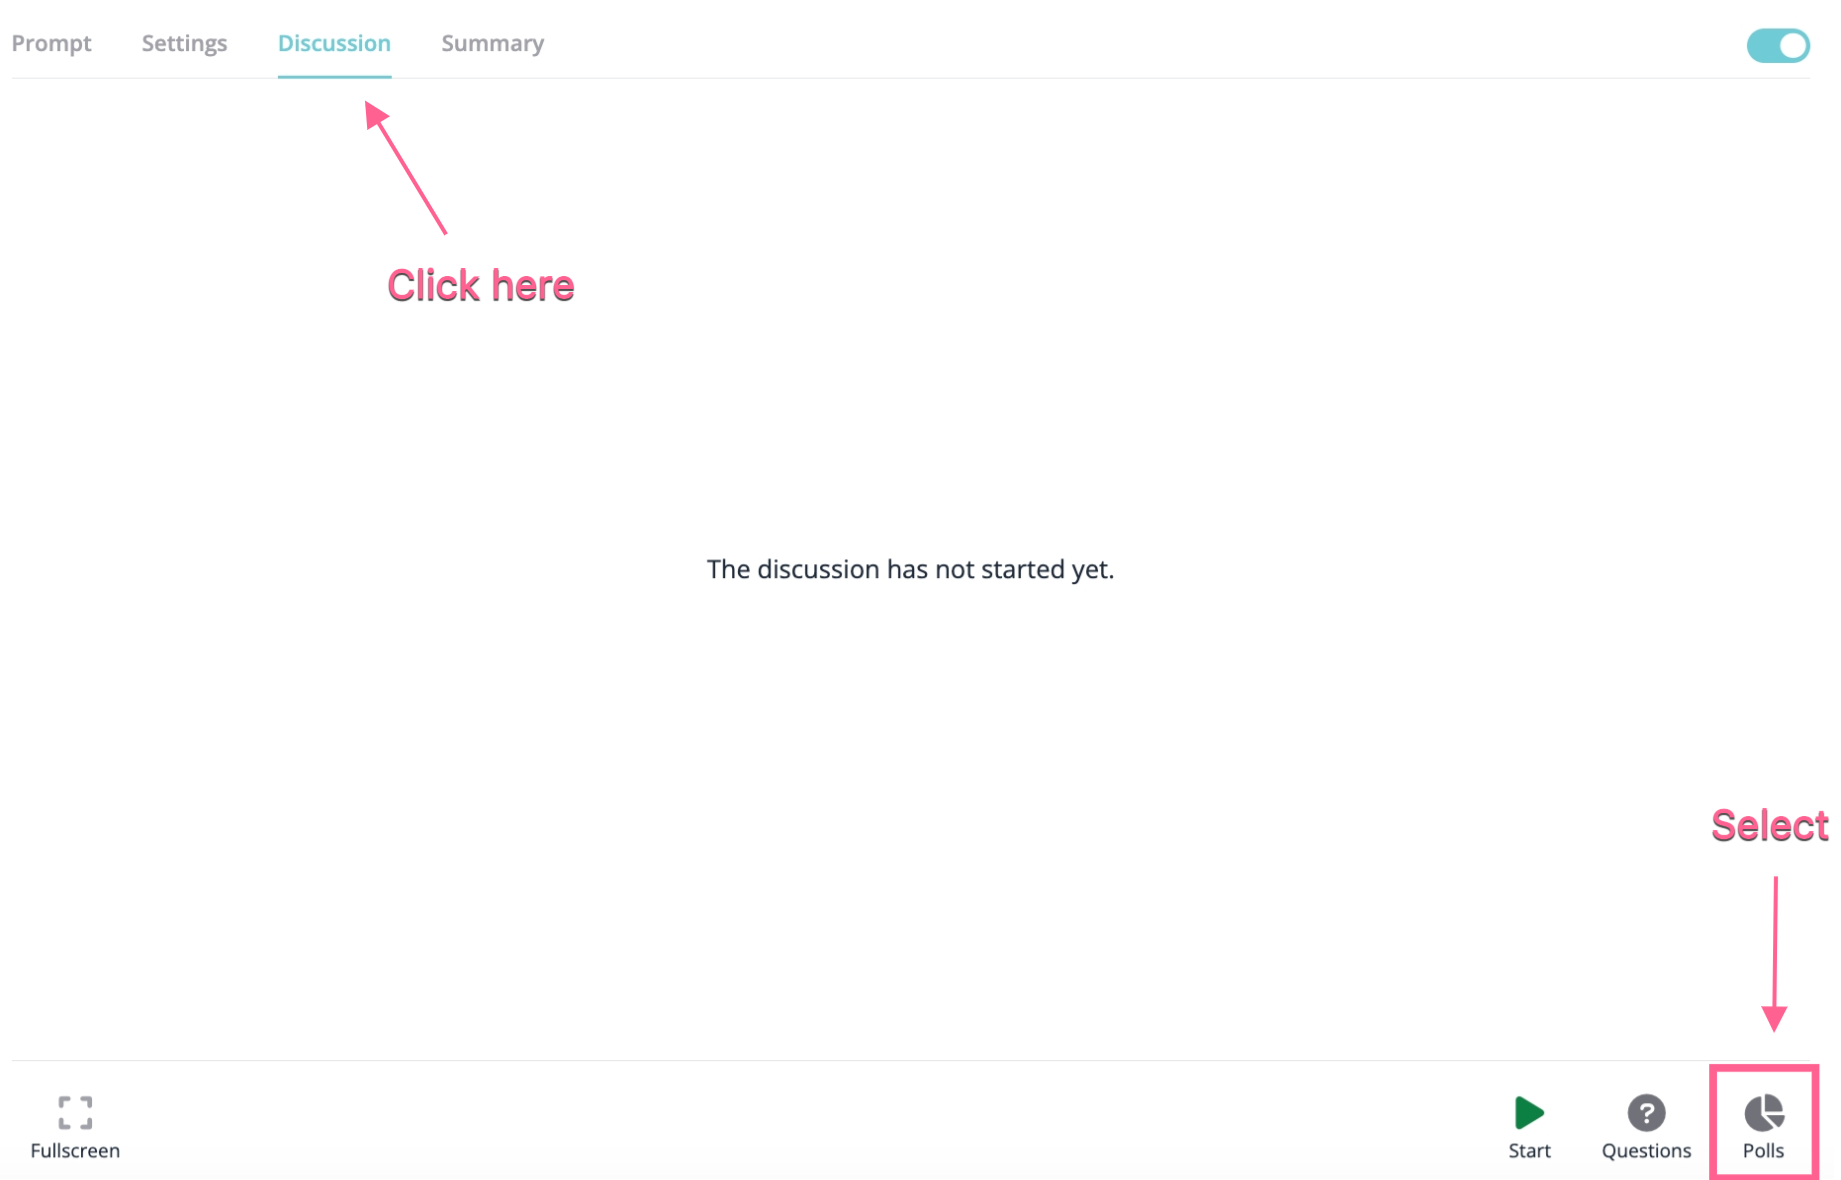
3. Create Polls
You can create polls for the students to participate in during the discussion. The prompt and polls will transfer over when you create duplicates.
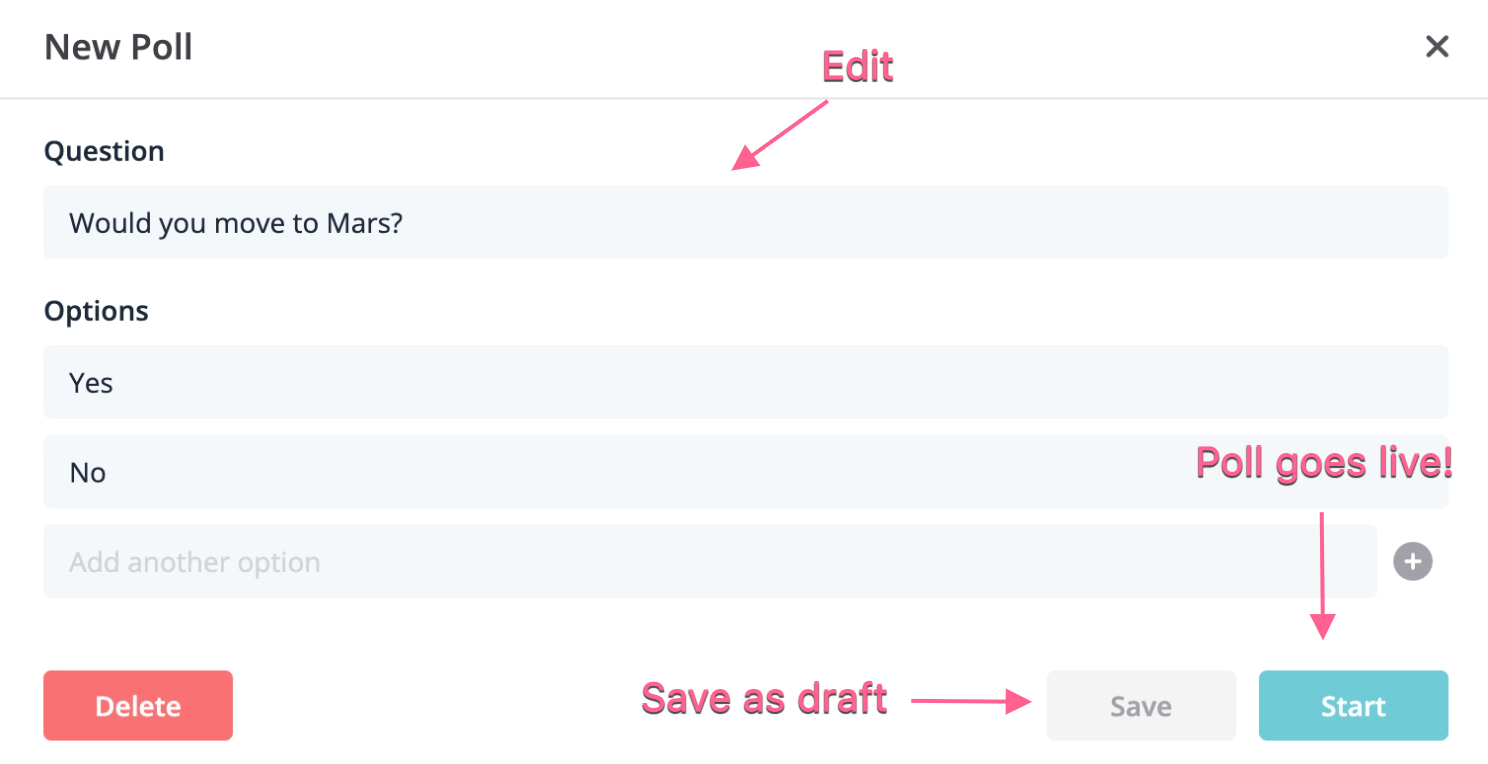
Next, create your poll and press "Save."
At any point during the Verbal RoundTable, you can select "Start" and the poll will go live.
4. Duplicate the RoundTable
Select the three dots beside the summary icon and select Duplicate RoundTable. Click the designated course(s) for this Duplicate to be copied into.
4. Change the Discussion Titles
Create separate RoundTables for each grouping and label them with the appropriate names.
For example: Group A, Group B, Group C...
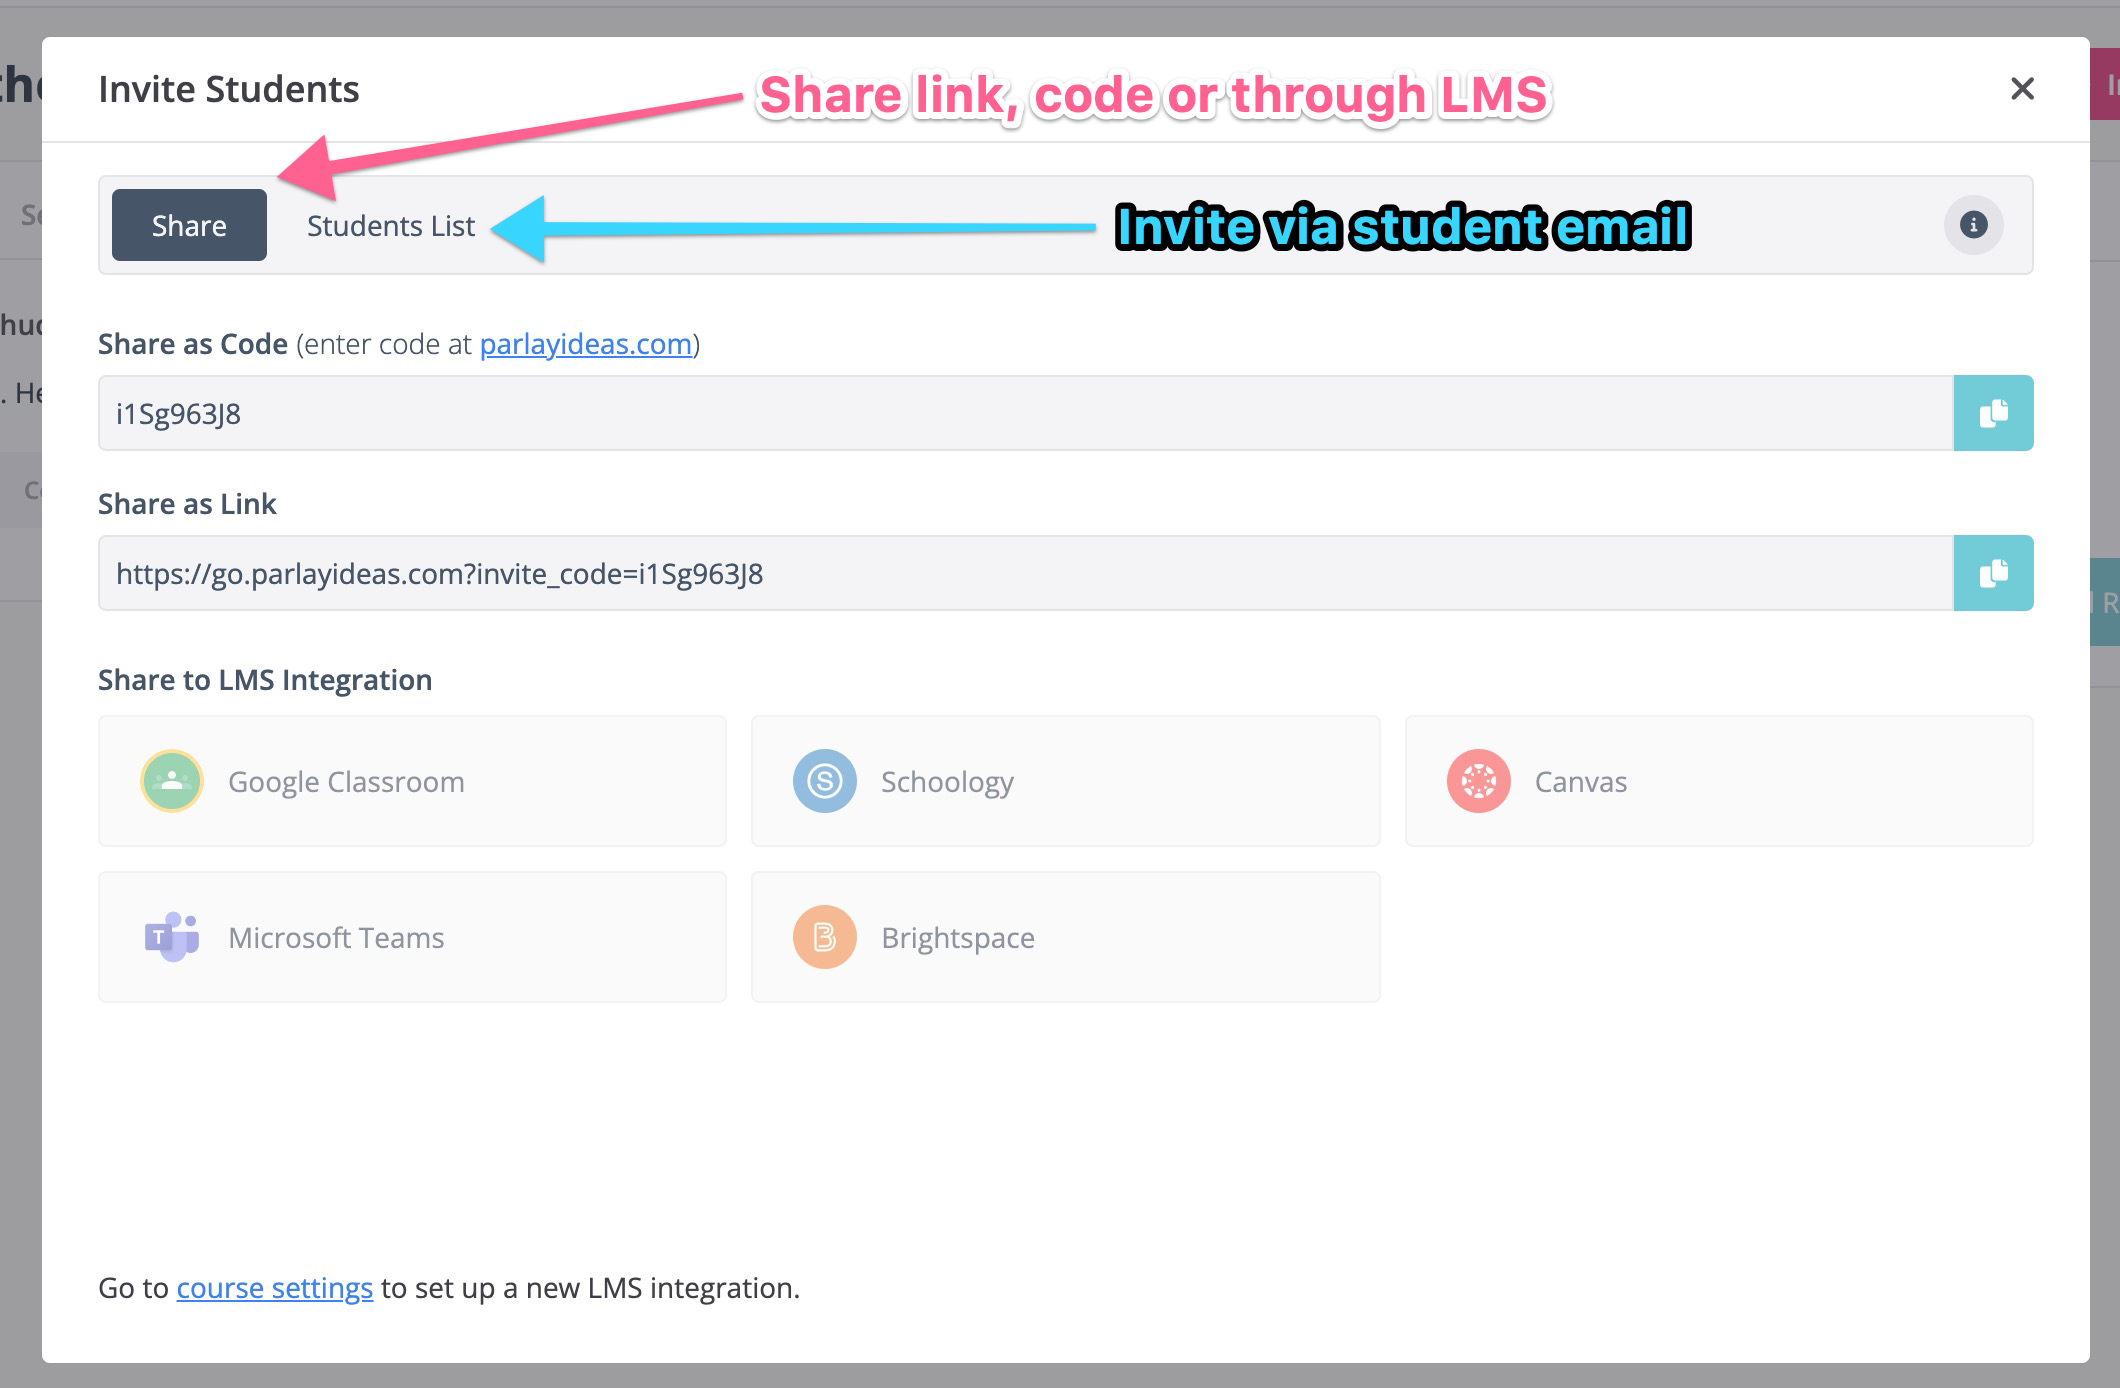
5. Invite Students
Each discussion will have a unique invite link. Post the designated invite links for each group.

Here's an example of a post for small groups:
Group 1: (Insert RoundTable link or code here)
Group 2: (Insert RoundTable link or code here)
Group 3: (Insert RoundTable link or code here)
Group 4: (Insert RoundTable link or code here)
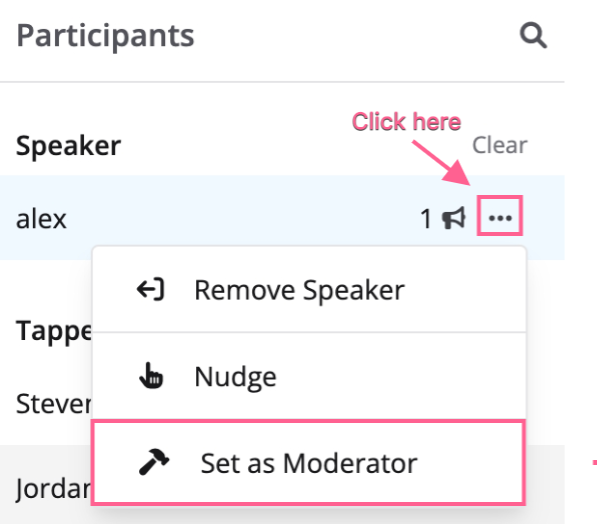
6. Select a Student Moderator for each group (OPTIONAL)
Click on a student to open the student assessment panel. Select Moderator to assign this role to them. This will enable that student to add/remove their peers from the queue. Teachers can change the moderator at any point in the discussion. The moderator will have a gavel icon appear on their image.
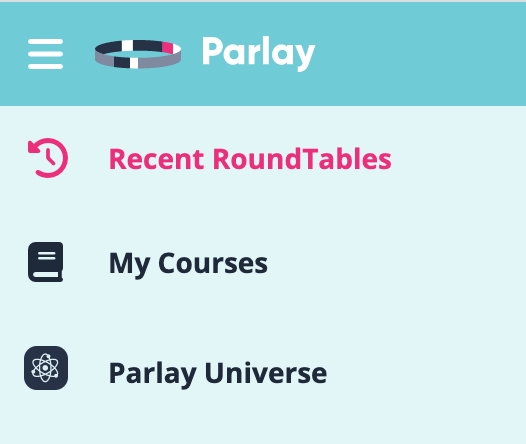
7. Toggle between groups
As the teacher, you can see the list of small groups under Recent RoundTables. You can find this on the left-hand side of your screen.
5 quick tips:
💬 Teachers can use small group discussions both in-person and online. Assign student moderators to manage the queue!
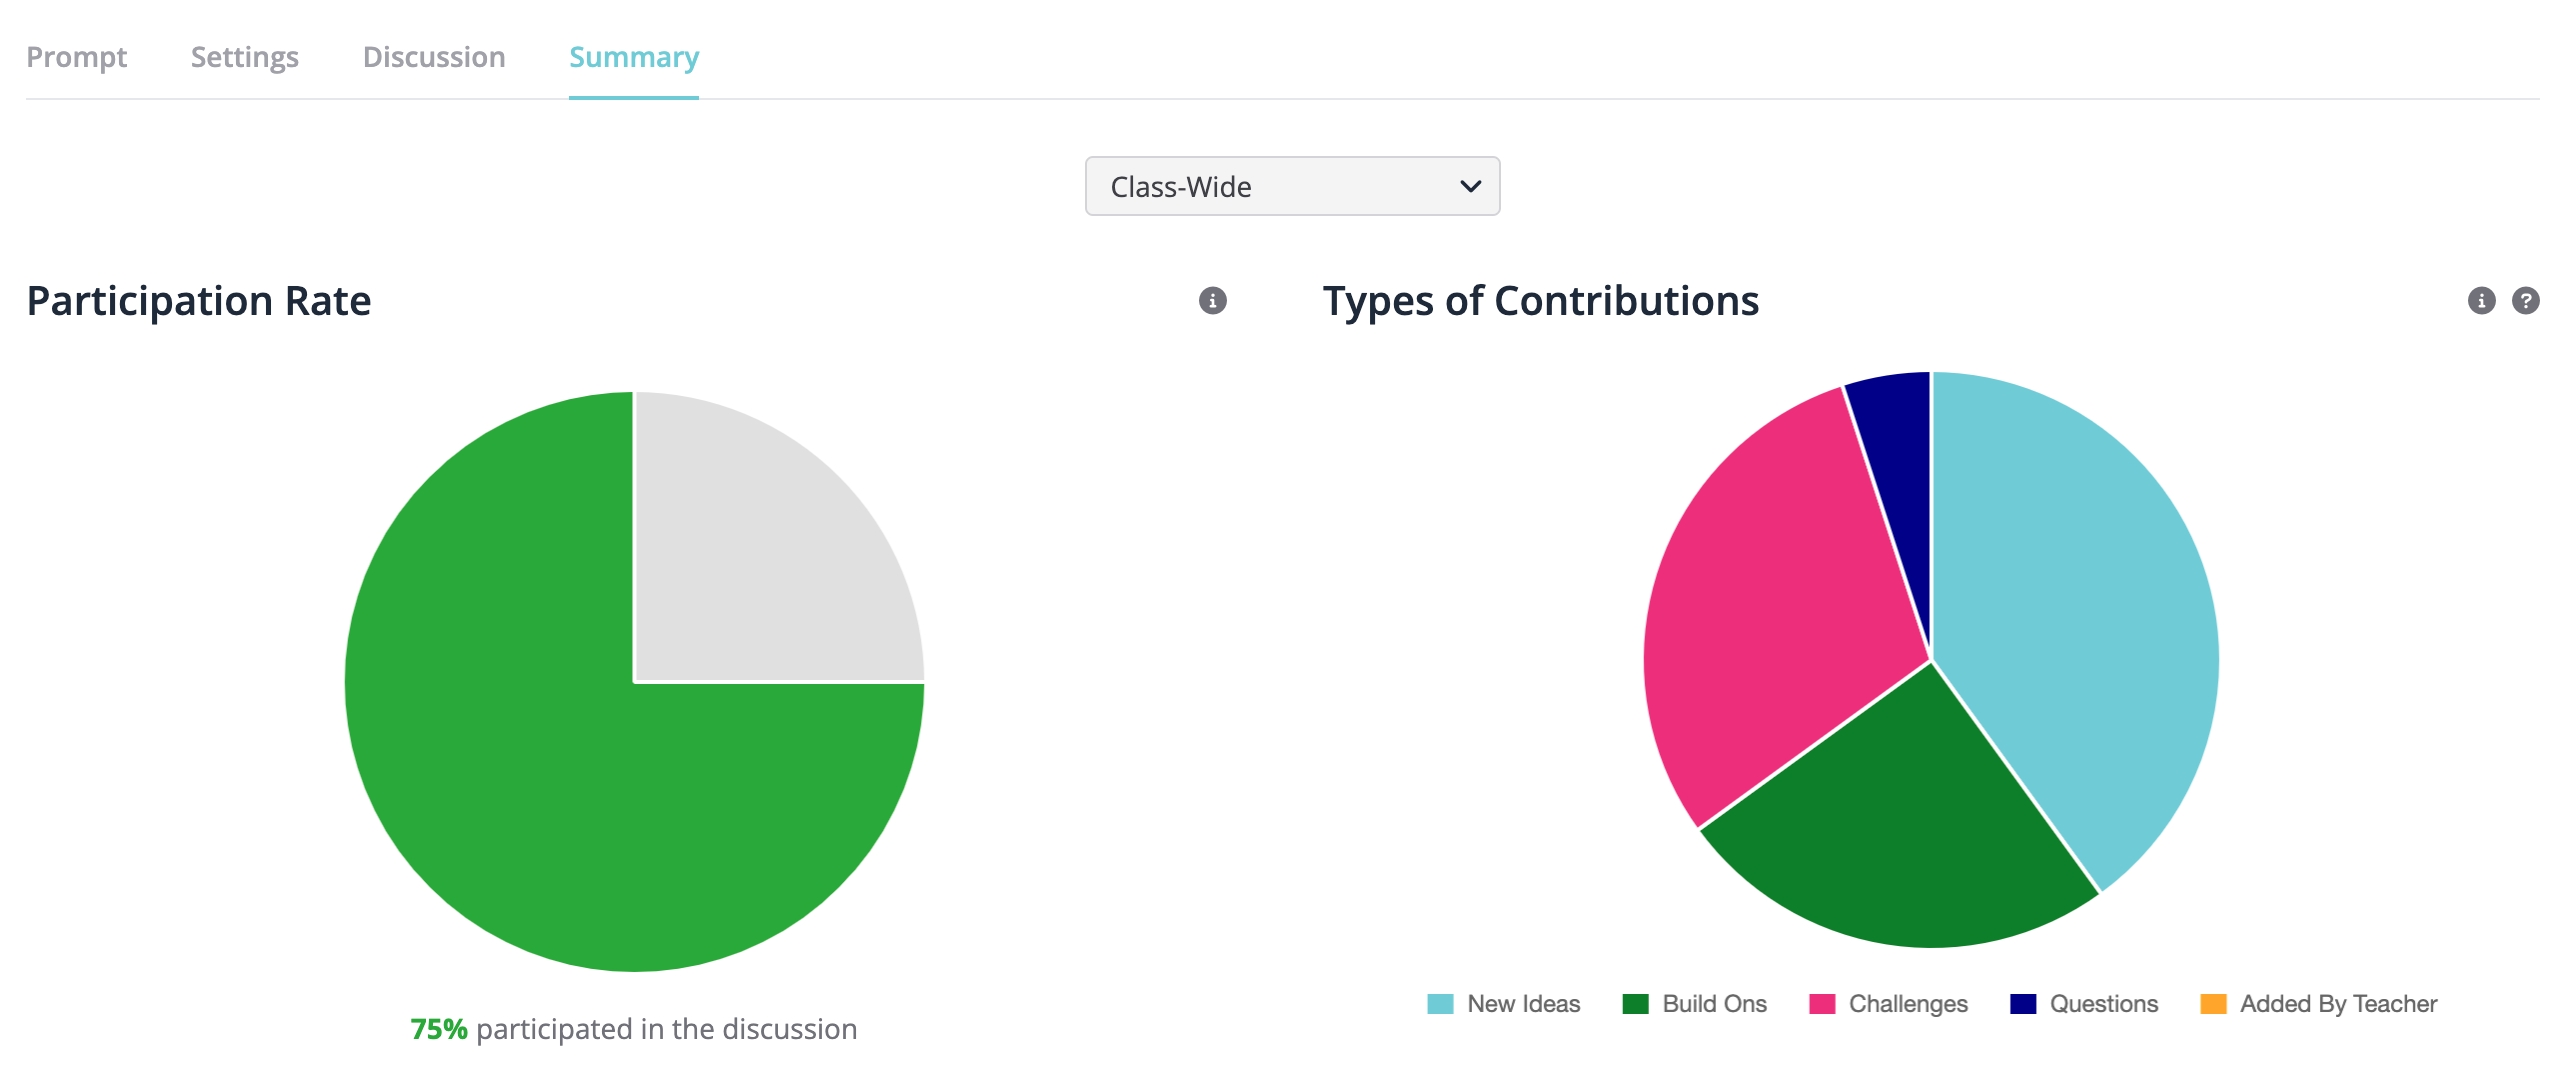
💬 Inform the students that the teacher will be reviewing the summary data to gain an inside look at how the discussion went. Encourage students to review the data with their small group!
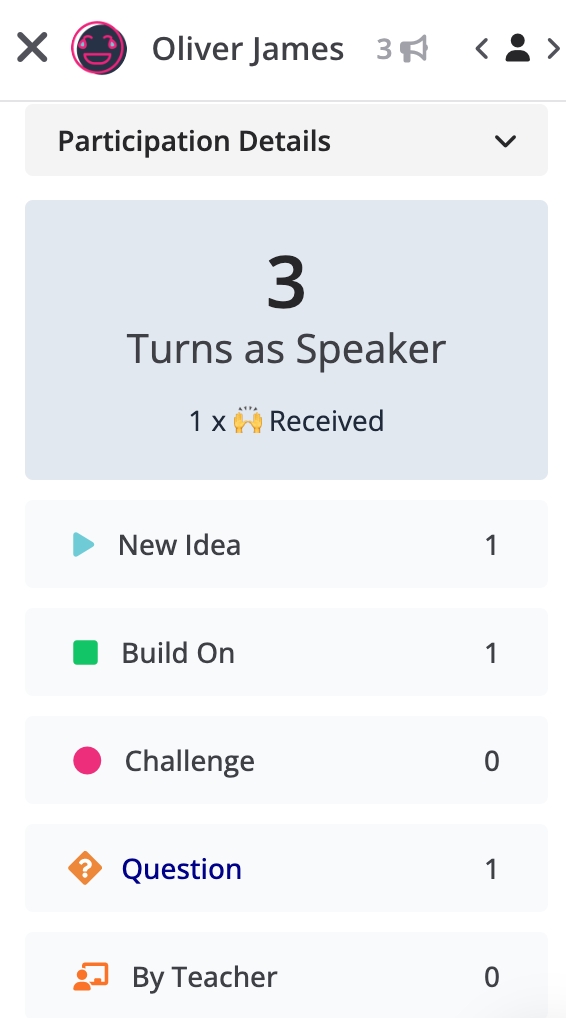
💬 Students can write notes to demonstrate their thinking, which can be observed by the teacher. Select a student's name, then scroll down to see the participation details.
💬 Encourage groups to set goals or establish discussion norms.
Ex., aim to hear from each person at least x number of times, let's actively encourage each other to share ideas.
💬 Share the Student Guide to Verbal RoundTable Textbook for additional guidance on how students can practice the 4 tap-in types (New Idea, Challenge, Build on and Question)
Ex., Here are the starters for the Challenge tap-in:

That's a wrap!

Continue exploring the Verbal RoundTable by clicking the links below:
- How to Boost Participation in a Verbal RoundTable