The Verbal RoundTable is a discussion where students discuss in real-time.
Teaching remotely? The Verbal RoundTable has built-in audio and video!
Here are the steps to get started with a Verbal RoundTable! 🙌
1. Log into your account www.parlayideas.com
2. Click New RoundTable

3. Choose Verbal RoundTable and the grade level.
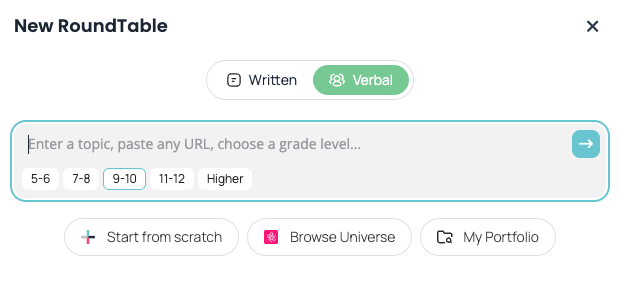
4. Type in your topic, paste a URL, upload a PDF, start from scratch or browse the Parlay Universe
5. See two versions of the drafted prompt. Make any changes that you'd like!
6. Select the Course(s).
7. Click Create RoundTable.

Here's how students will view your resources and discussion prompts:
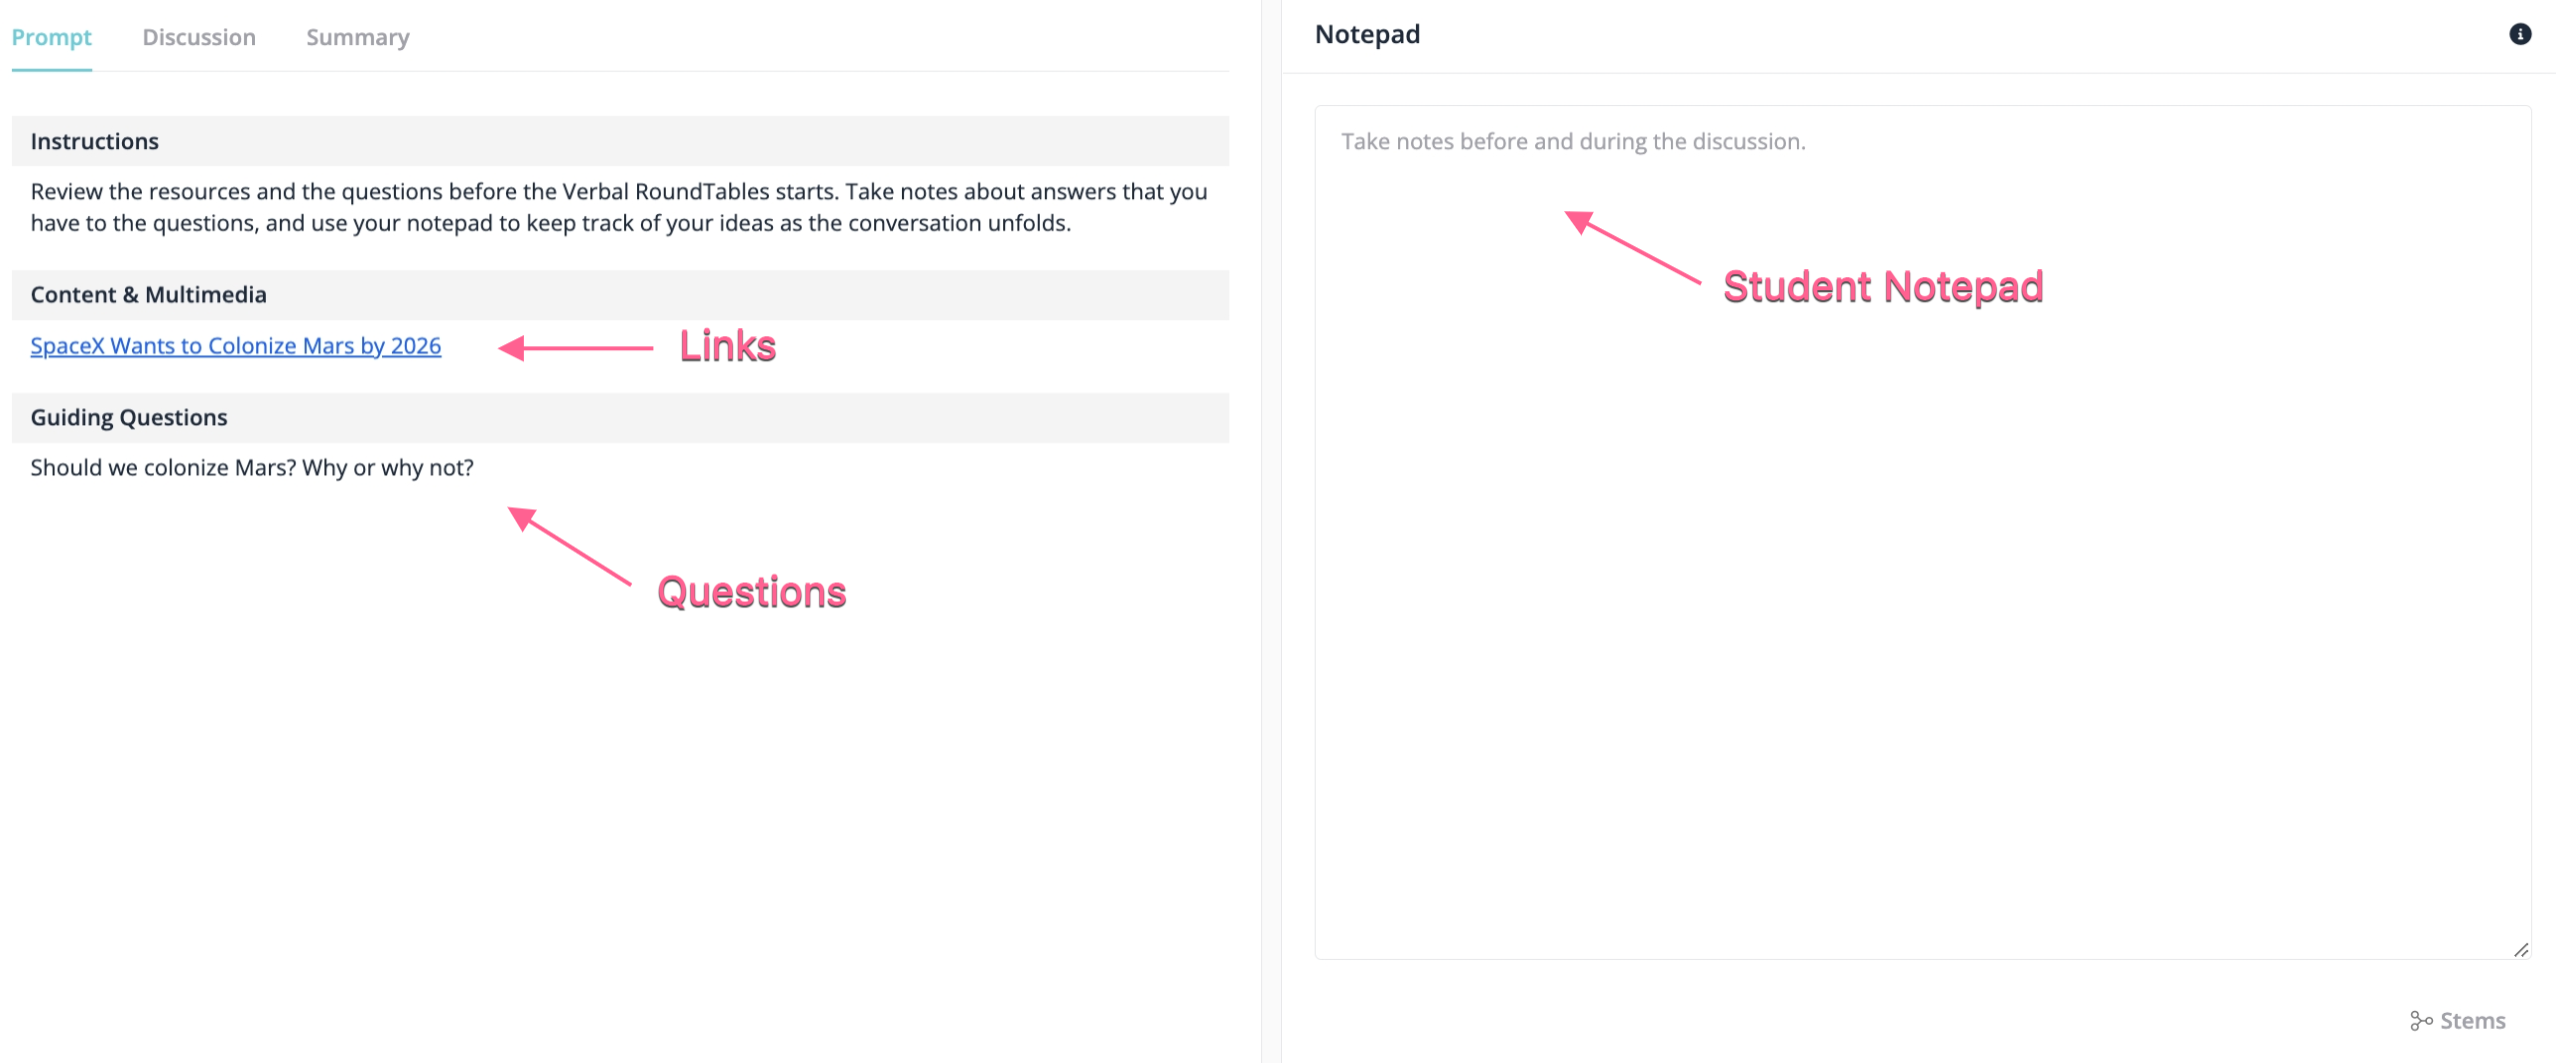
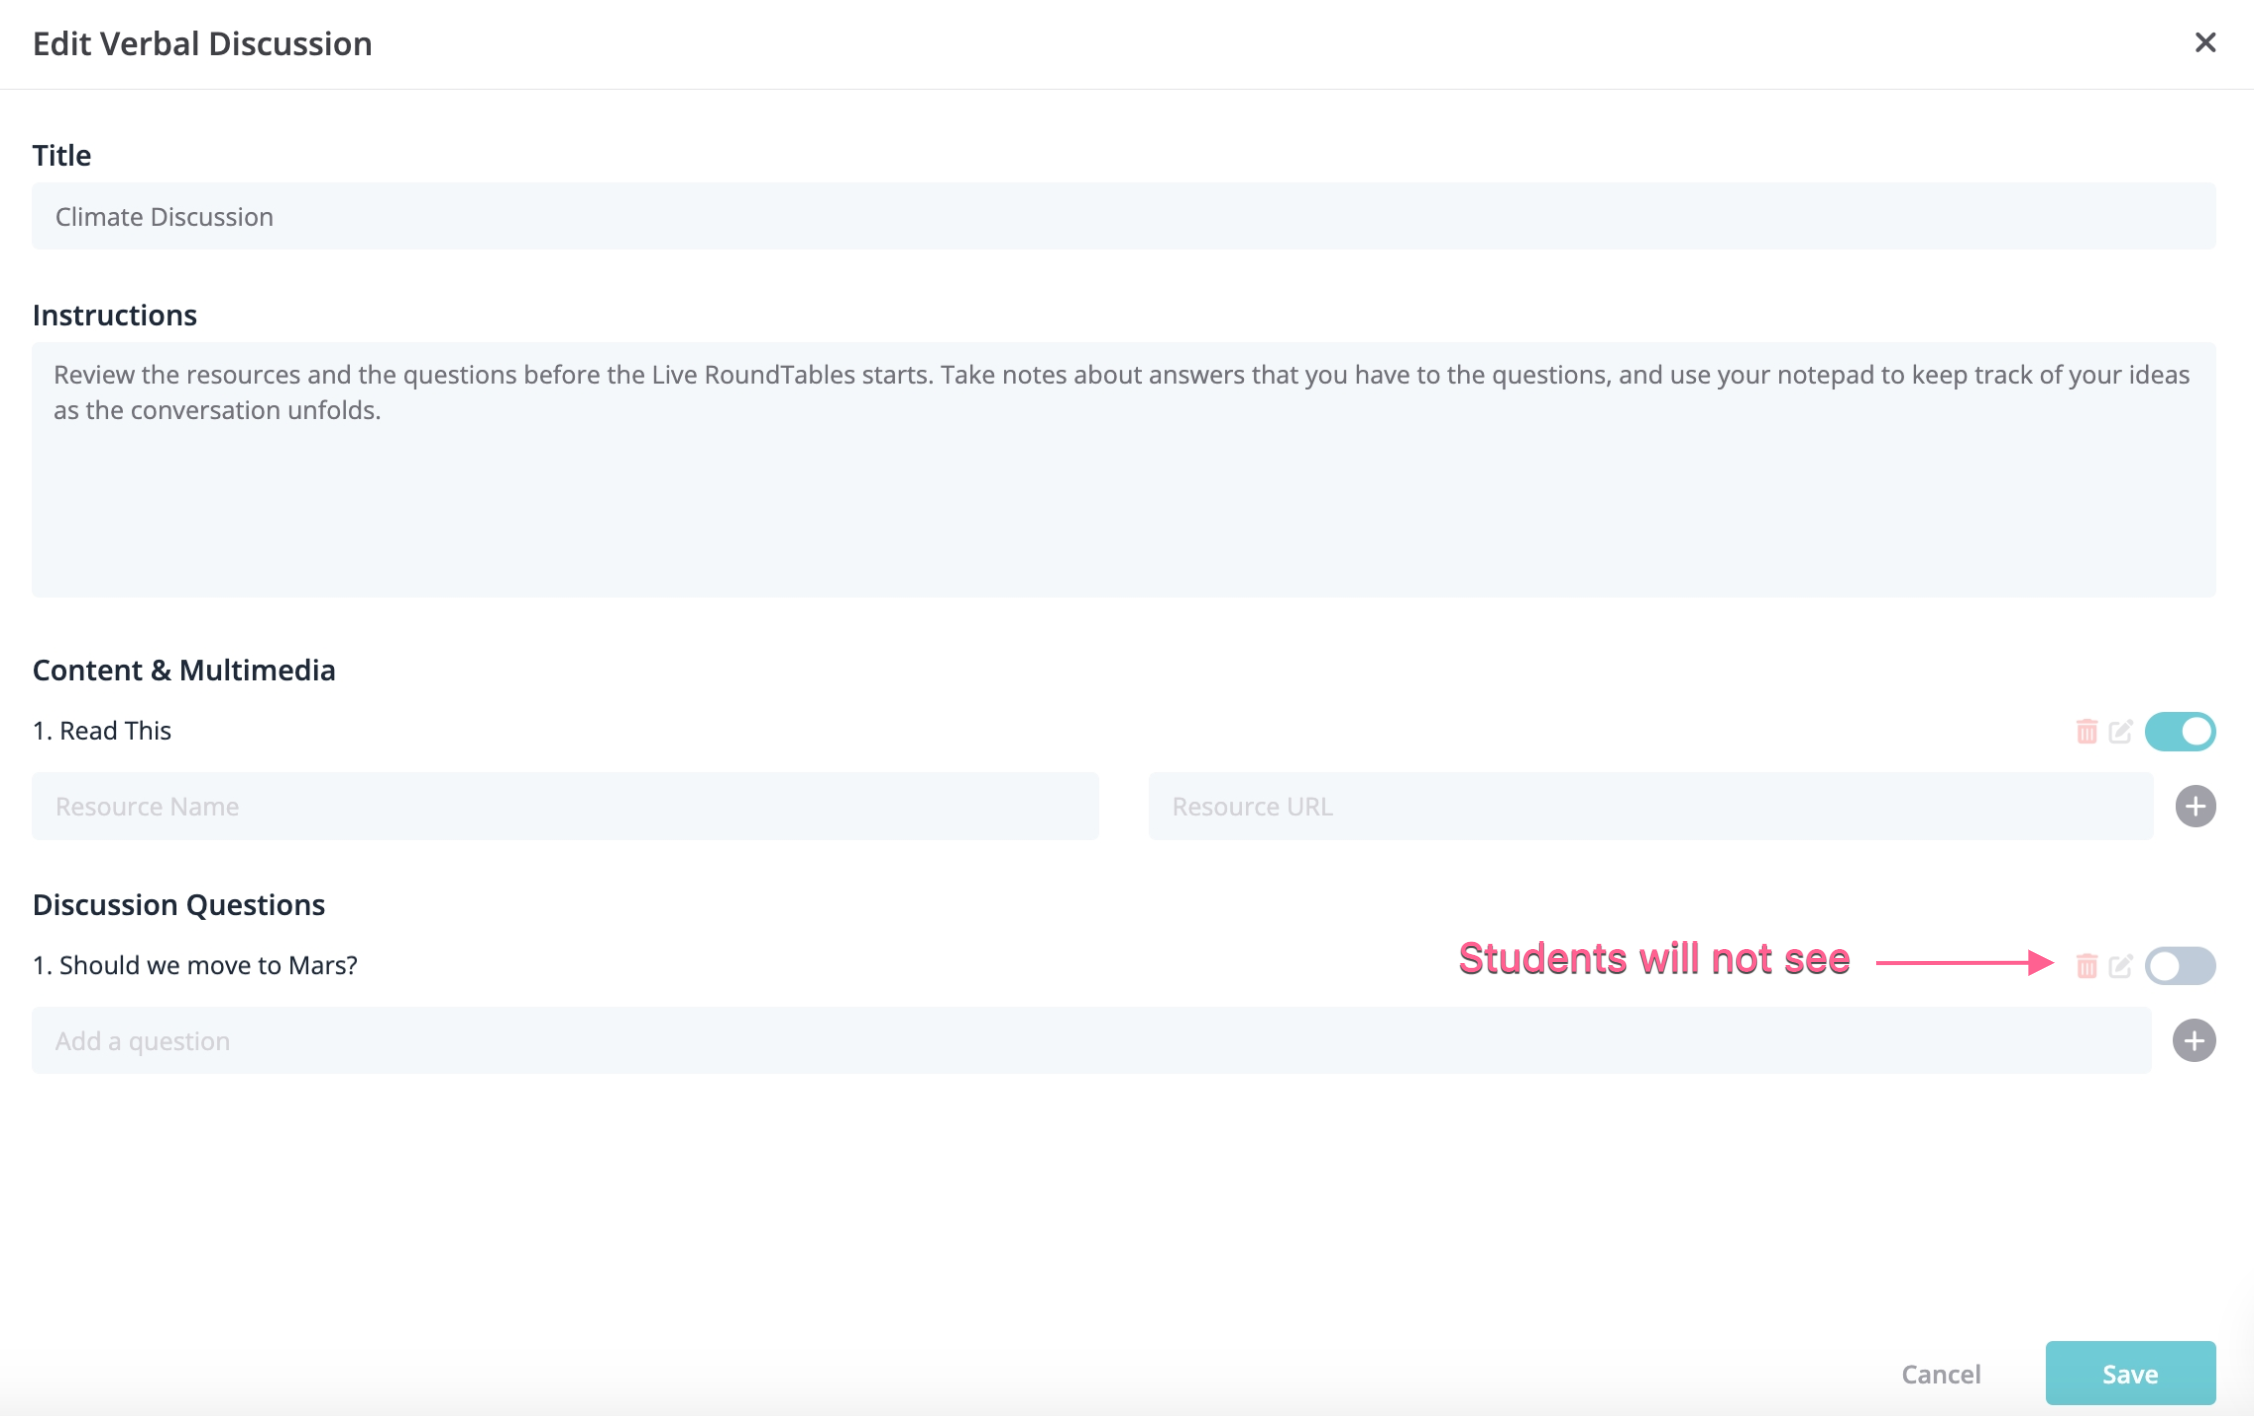
Parlay Tip: Teachers can turn on/off visibility for resources and questions during a Verbal RoundTable. This means that, as the RoundTable unfolds, you can release resources and questions as they become pertinent to the discussion. It helps with scaffolding the activity, and makes it easier for students to digest the information.
8. Edit Settings and Sentence Stems
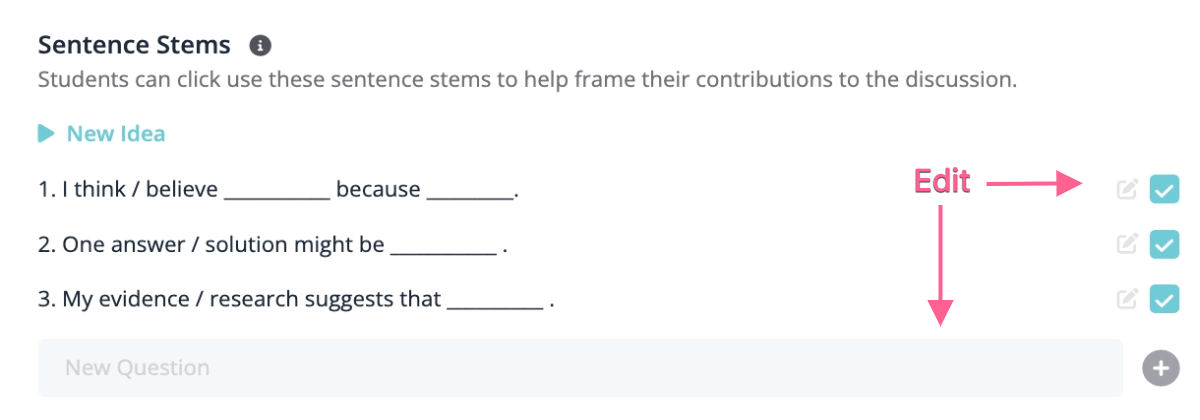
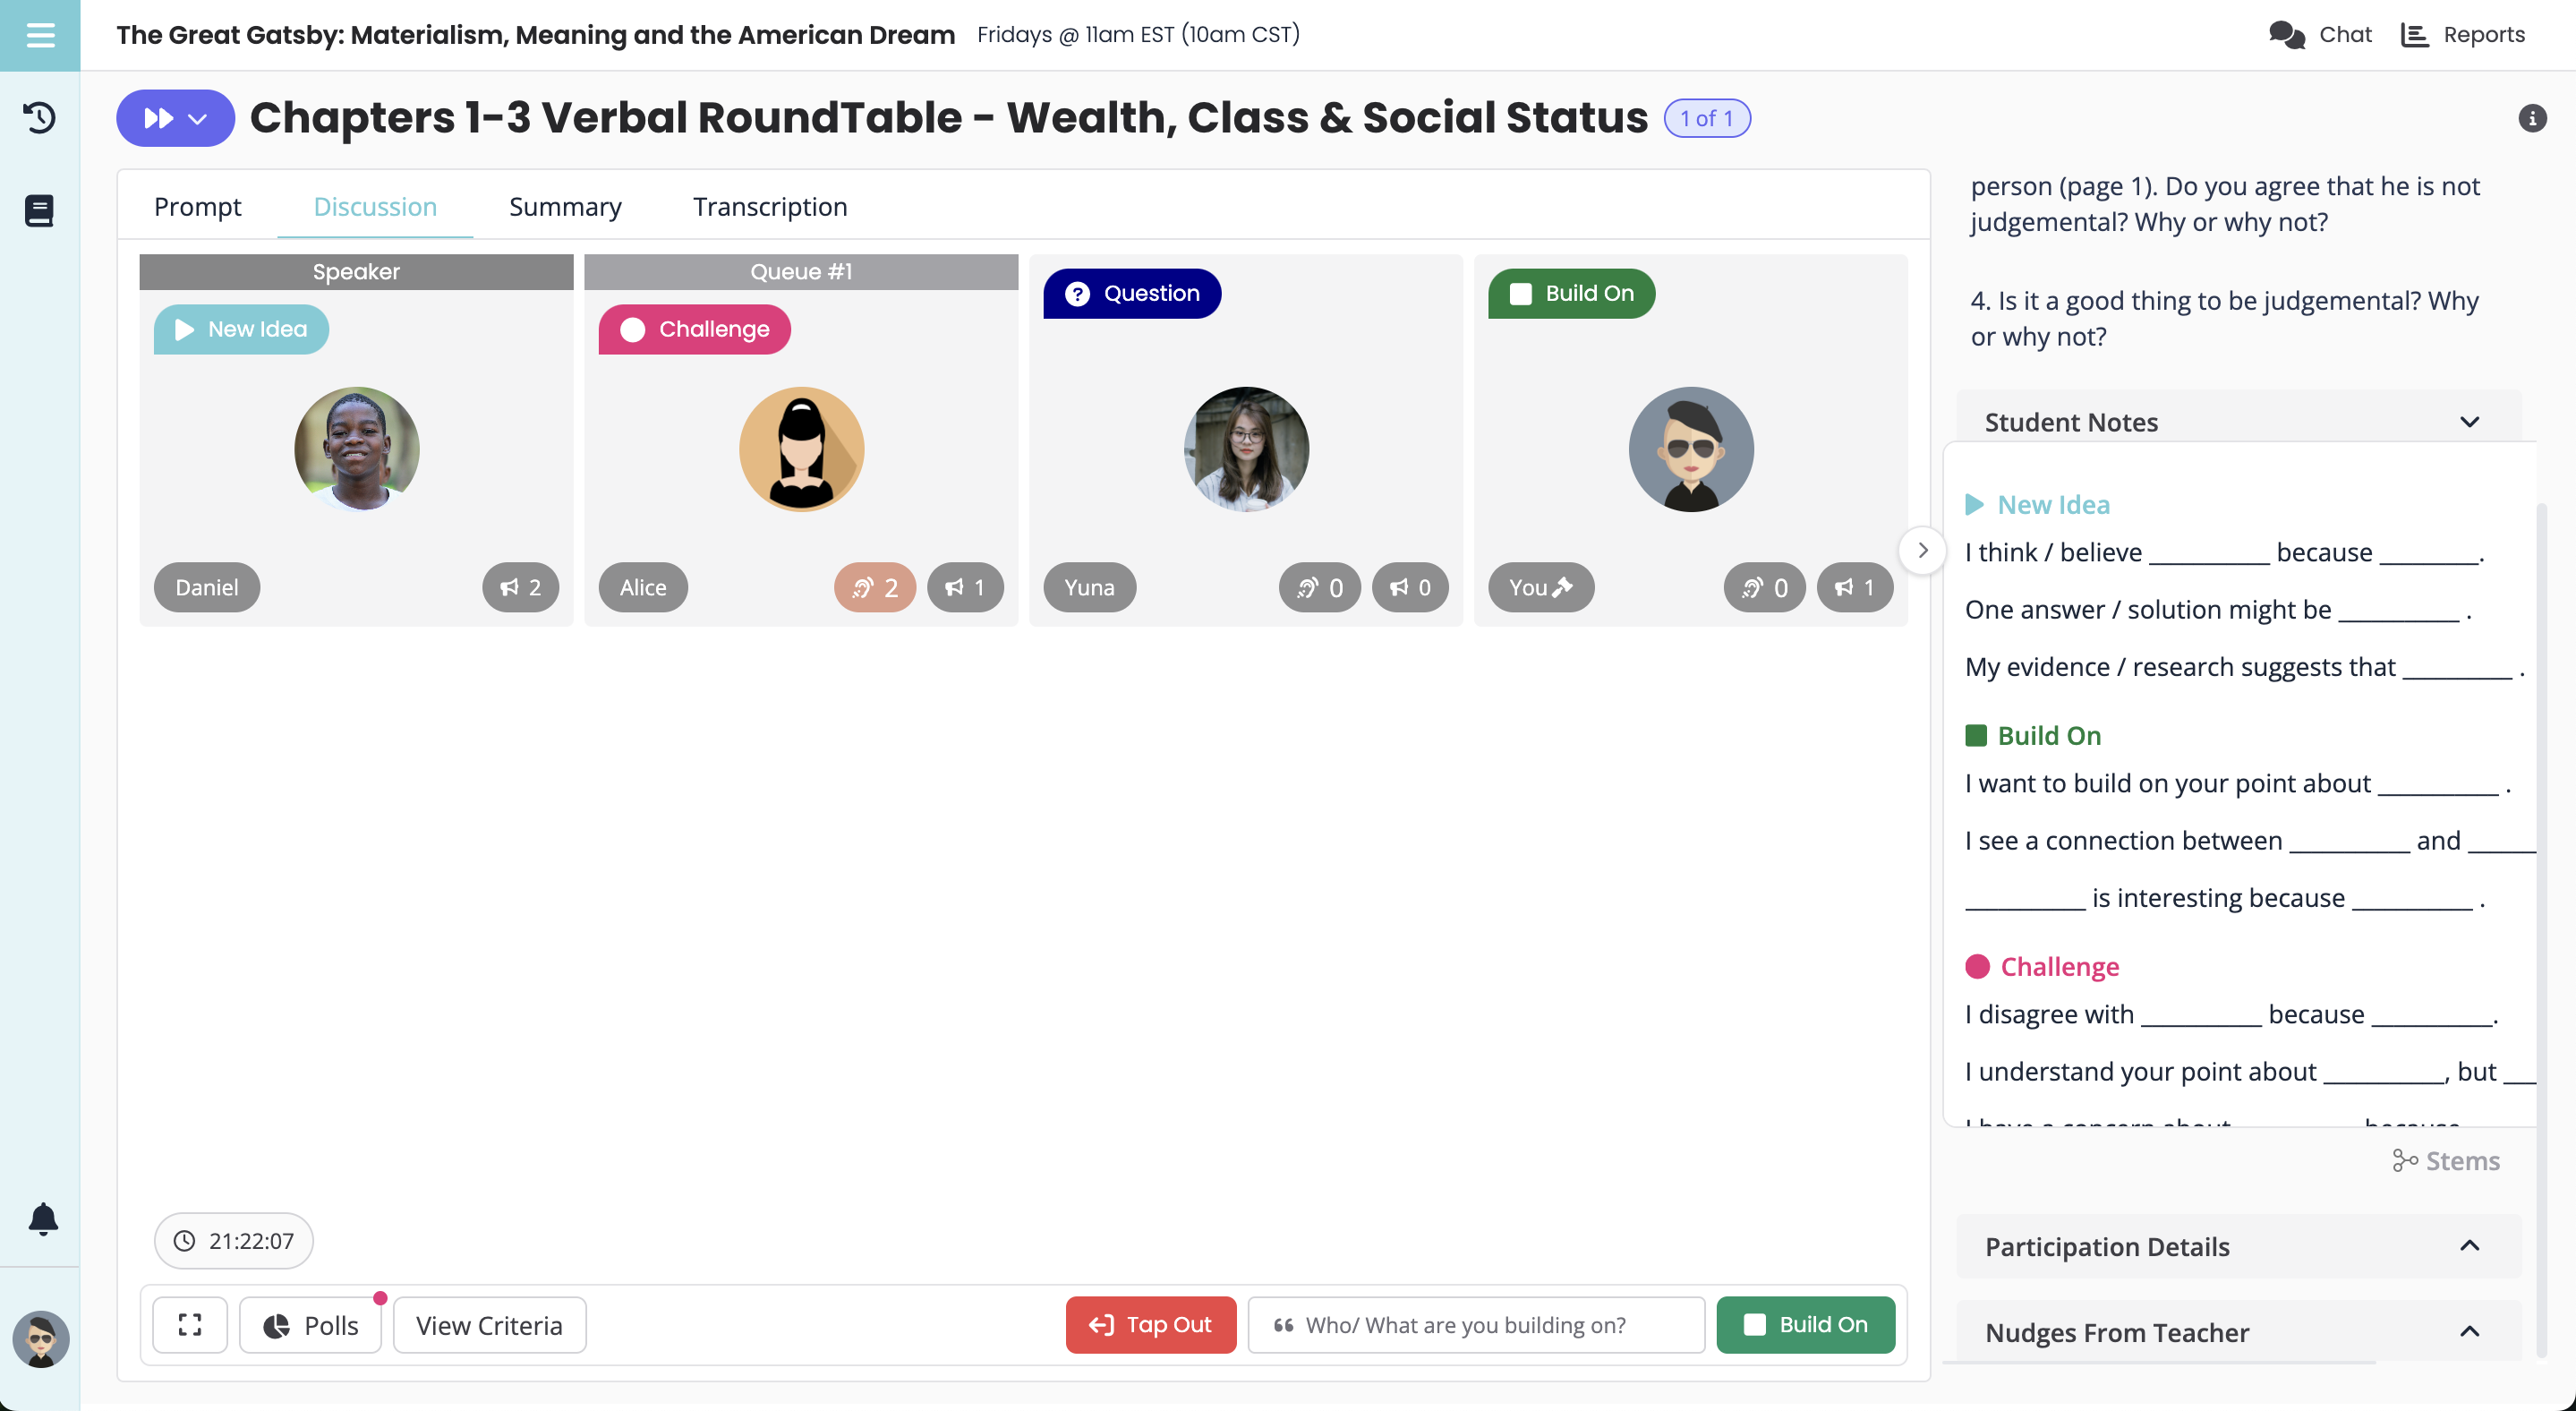
Teachers can set "sentence stems" for students to review during the Verbal RoundTable. These sentence stems are organized according to tap-in type (new idea, build on, challenge, question). This feature will help students frame their participation during the Verbal RoundTable.
Teacher View:
First, click "Settings" in your toolbar. To edit your sentence stems, select the grey icon. If you'd like to hide any of the sentence stems, click the checkbox.
Finally, you can customize your sentence stems by adding a new stem in the grey box below.
Student View:
9. Pre Set Any Polls (OPTIONAL)
You can pre-set the polls that you would like to send out during the discussion.
First, click on "Discussion" in the toolbar. Select the "Polls" icon in the bottom right corner.
After you create a new poll you can save it as a draft. Students submit anonymously to polls.

10. Set Assessment Criteria (OPTIONAL)
Edit assessment criteria in Settings.

11. Invite Students
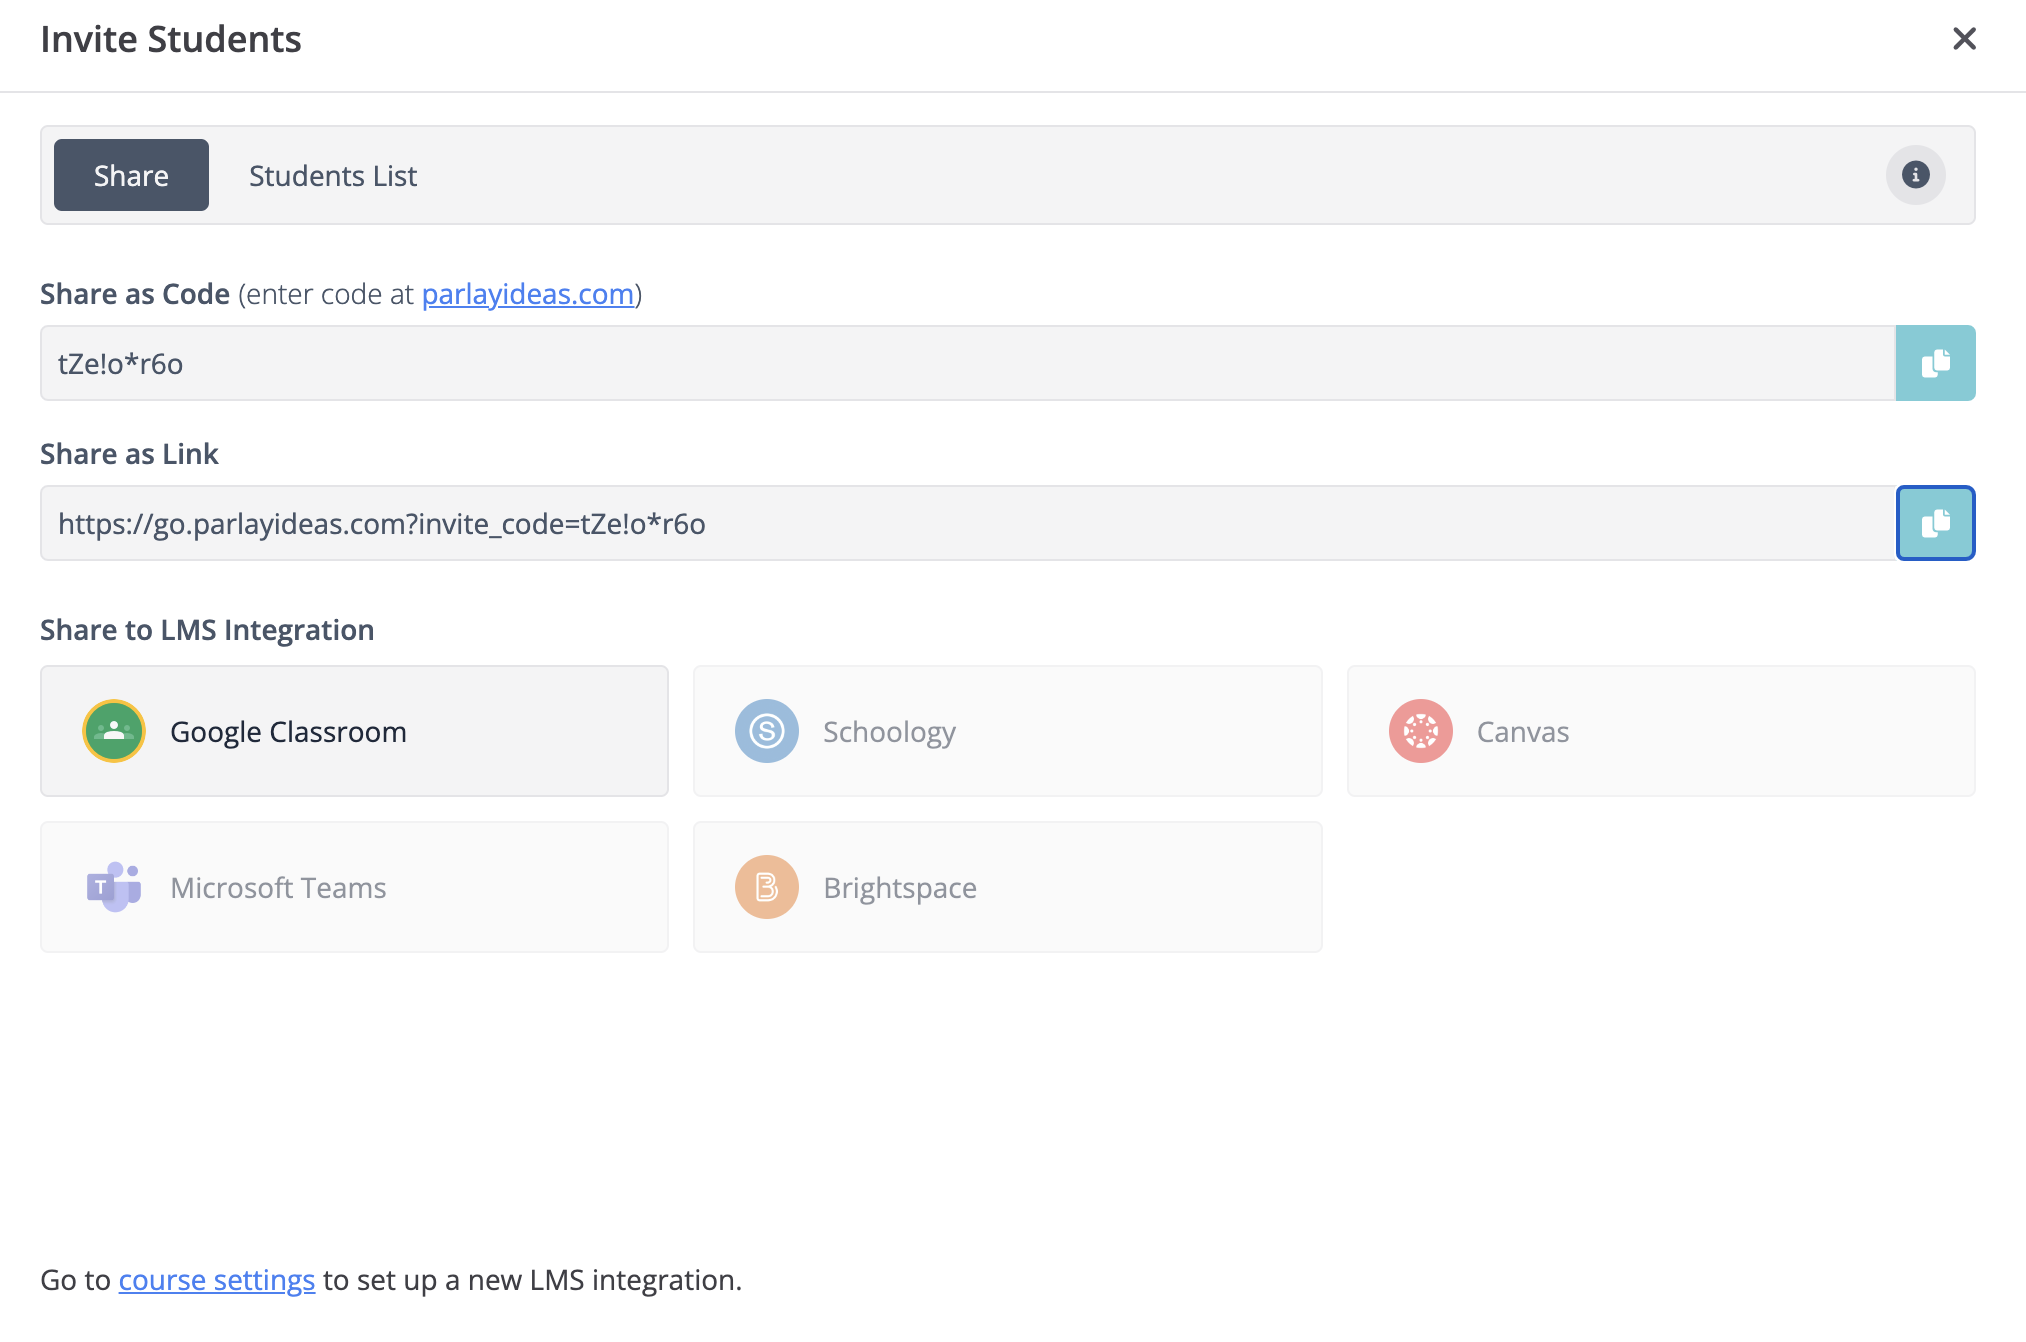
You can invite students using the magic link or code. When your students click this link, they will be brought into the discussion after signing in and automatically added to this course.
They can sign in with Google, Microsoft, or create a new account. If your students have already joined your course from a previous discussion, you can invite them via email.
First, click "Invite Students:"
Next, the pop-up window will allow you to share the code or link for students to participate in the RoundTable:
12. Click Start to start the discussion.

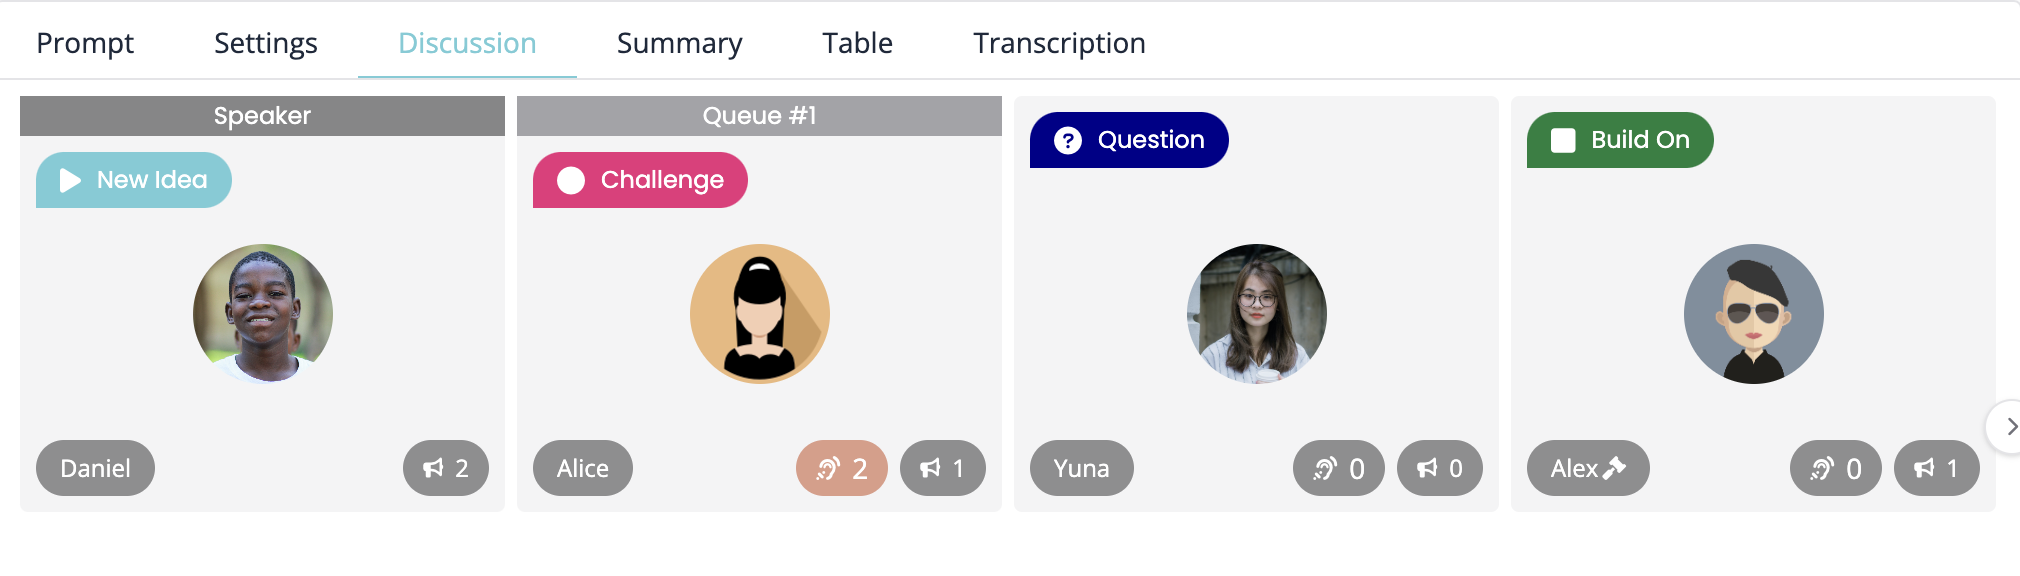
13. Tapping In
Students begin tapping in when they have something to say.
14. Queue System
Students will become the speaker in the order that they tapped in. If you want to add a student into the queue, hover over their name and select Add to Queue. If you'd like to manually choose the speaker each time, you can turn off automatic turns in the settings tab.
To select a student moderator:
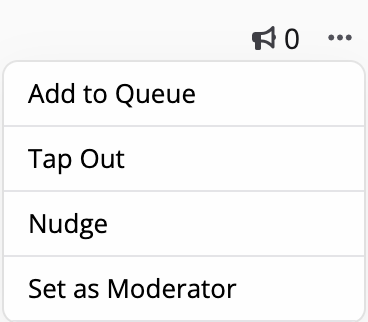
Click on the three grey dots next to your student's name in the Participants panel to the right. You can switch the Moderator role at any time during the discussion.
15. Nudges
At any point in the discussion, you can nudge students which sends a private message to the student. You can personalize this message to send instantaneous feedback, or encourage students to share their ideas.
16. Teacher Assessment
During the discussion, teachers click each student in the list to see a summary of individual engagement, evaluate, and provide personalized feedback.

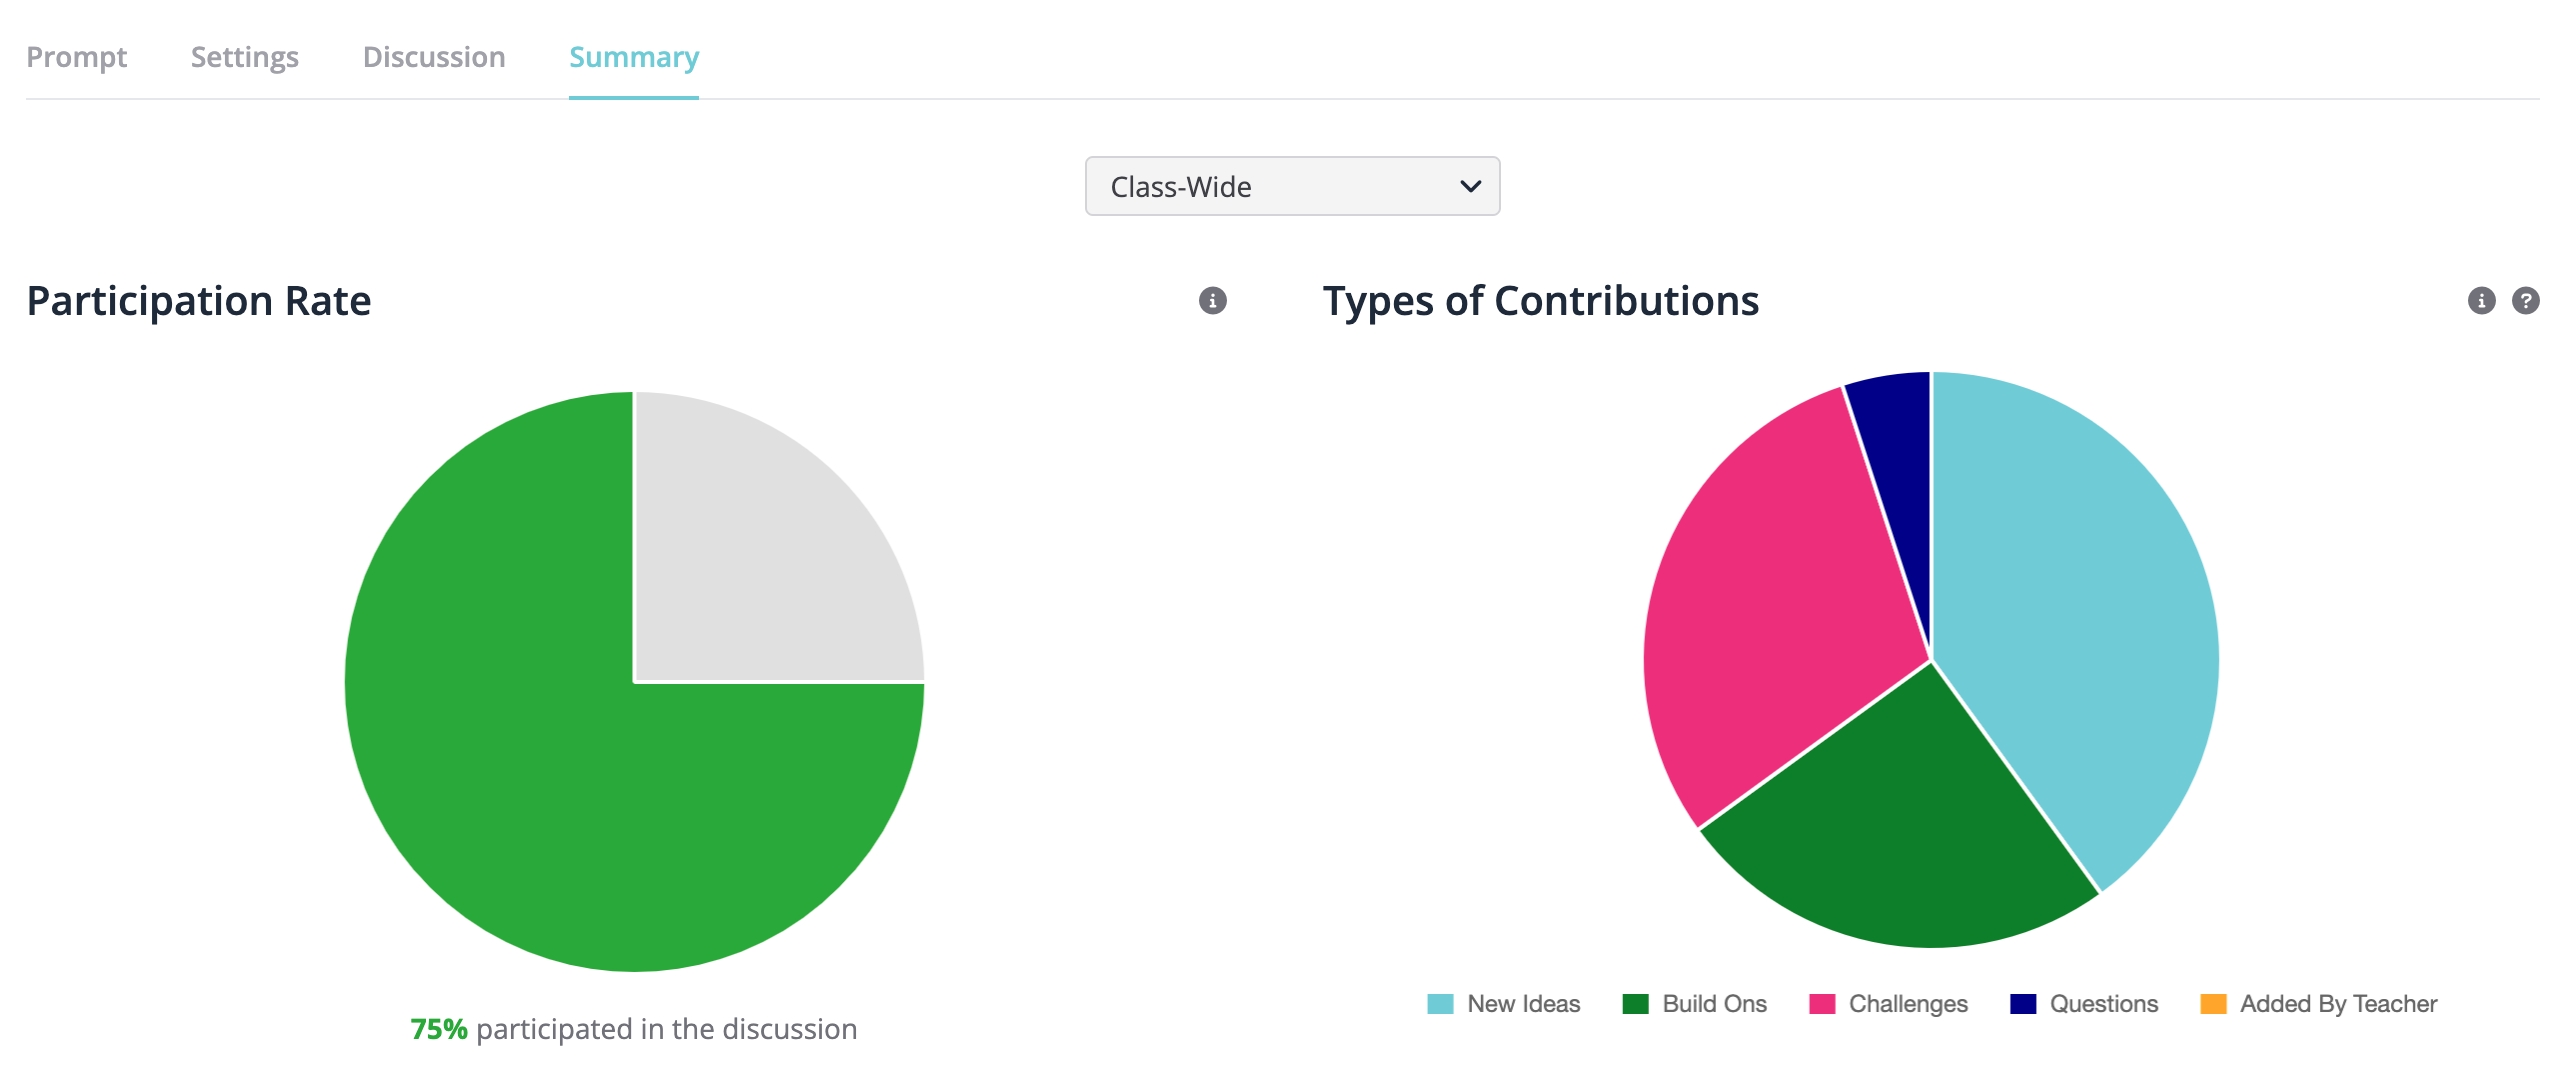
17. Summary Report
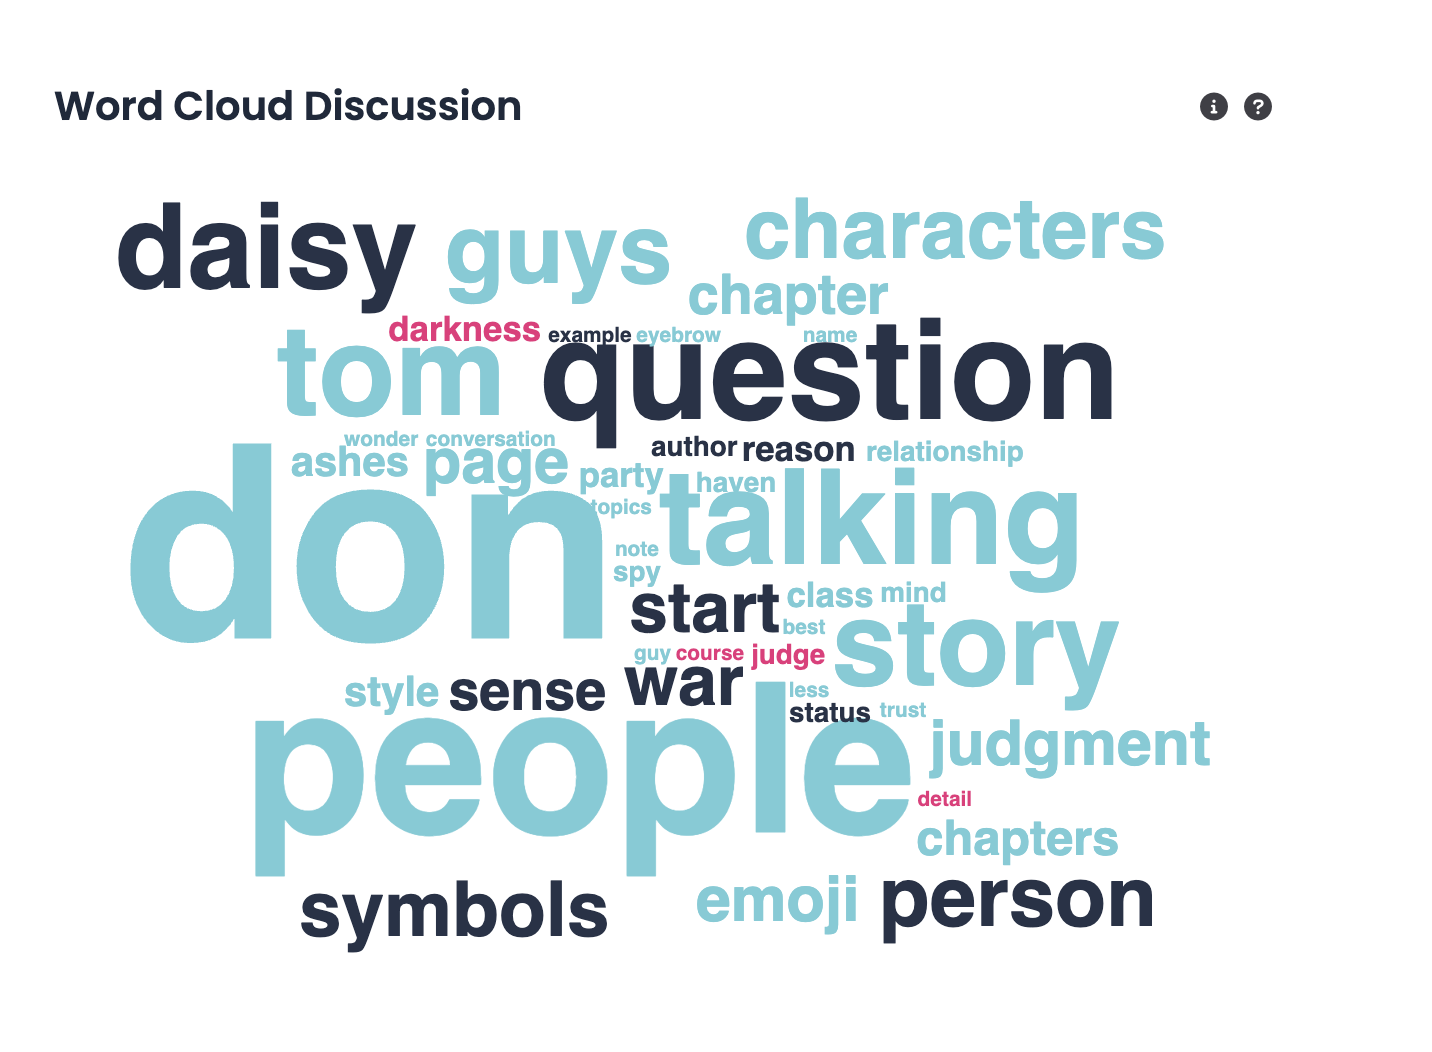
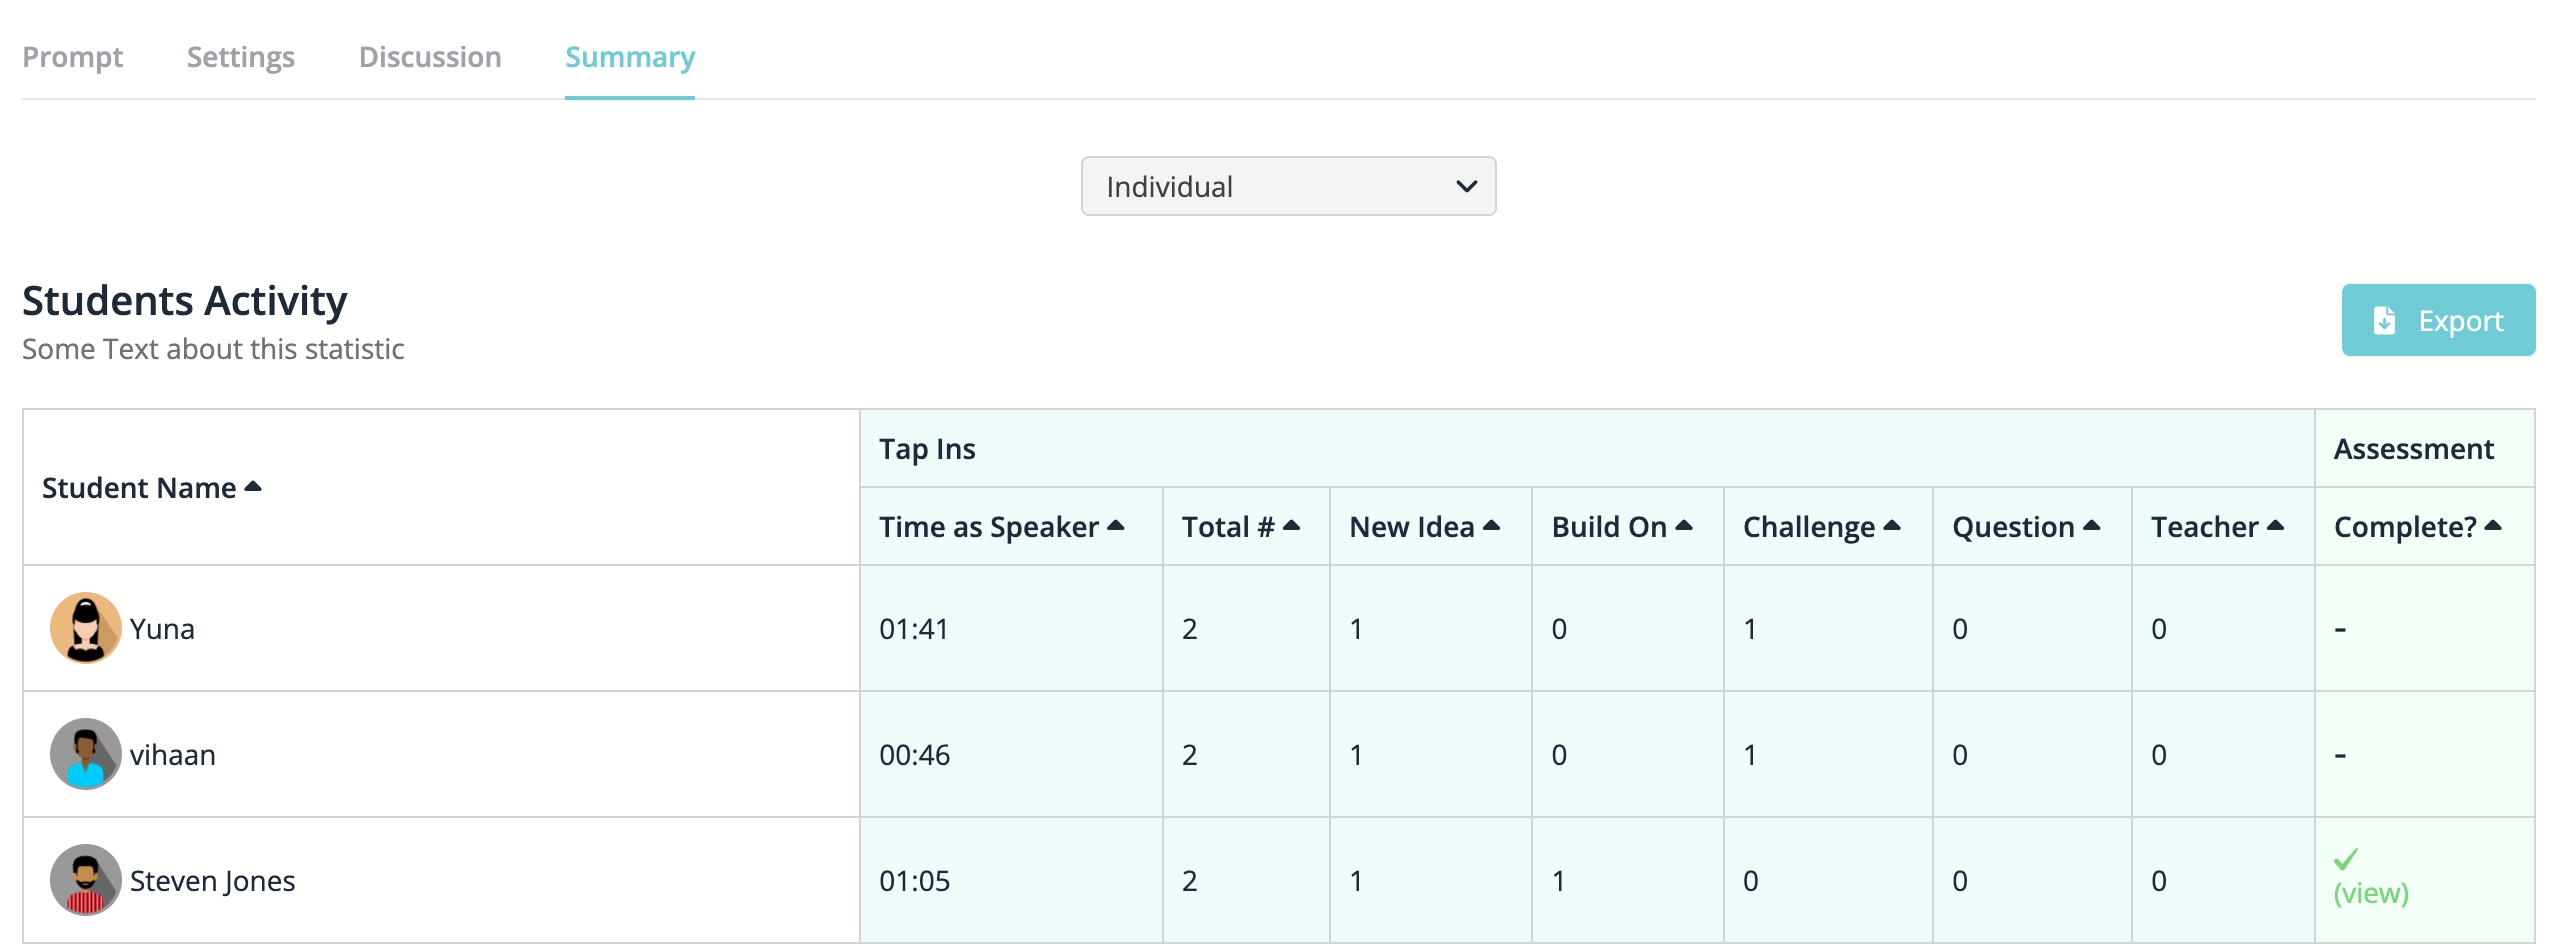
Don’t forget to review the summary report at the end of the discussion! Select the Summary icon in the top right corner to review data about class-wide and individual student engagement.
Class-Wide Engagement
Individual Student Breakdown
 That’s a wrap!
Continue exploring the Verbal RoundTable by clicking the links below:
- How to Boost Participation in a Verbal RoundTable